Python OpenCV实现测量图片物体宽度
一、 题目描述
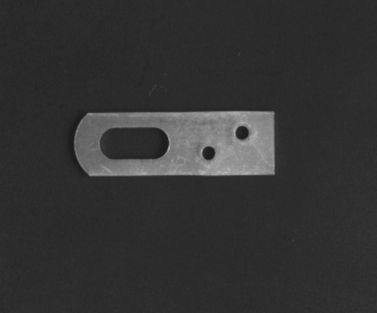
测量所给图片的高度,即上下边缘间的距离。
思路:
将图片进行阈值操作得到二值化图片。 截取只包含上下边框的部分,以便于后续的轮廓提取 轮廓检测 得到结果二、 实现过程
1.用于给图片添加中文字符
#用于给图片添加中文字符def ImgText_CN(img, text, left, top, textColor=(0, 255, 0), textSize=20): if (isinstance(img, np.ndarray)): #判断是否为OpenCV图片类型 img = Image.fromarray(cv2.cvtColor(img, cv2.COLOR_BGR2RGB)) draw = ImageDraw.Draw(img) fontText = ImageFont.truetype(r’C:WindowsFontssimsun.ttc’, textSize, encoding='utf-8') ##中文字体 draw.text((left, top), text, textColor, font=fontText) #写文字 return cv2.cvtColor(np.asarray(img), cv2.COLOR_RGB2BGR)
2.实现图片反色功能
#实现图片反色功能def PointInvert(img): height, width = img.shape #获取图片尺寸 for i in range(height): for j in range(width): pi = img[i, j] img[i, j] = 255 - pi return img
3.边缘检测
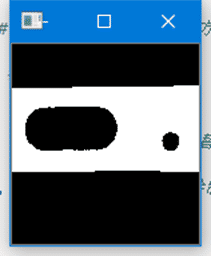
# canny边缘检测edges = cv2.Canny(th, 30, 70) res=PointInvert(edges) #颜色反转#显示图片cv2.imshow(’original’, th) #显示二值化后的图,主题为白色,背景为黑色 更加容易找出轮廓key = cv2.waitKey(0)if key==27: #按esc键时,关闭所有窗口 print(key) cv2.destroyAllWindows()
4.轮廓操作
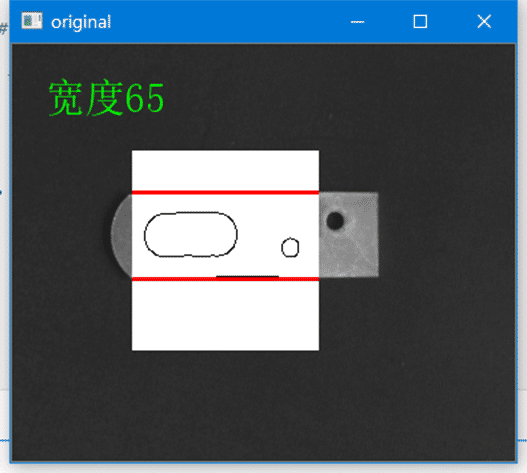
contours, hierarchy = cv2.findContours(th, cv2.RETR_EXTERNAL, cv2.CHAIN_APPROX_SIMPLE) #得到轮廓cnt = contours[0]#取出轮廓x, y, w, h = cv2.boundingRect(cnt) #用一个矩形将轮廓包围img_gray = cv2.cvtColor(res, cv2.COLOR_GRAY2BGR)#将灰度转化为彩色图片方便画图cv2.line(img_gray, (x, y), (x + w, y), (0,0,255), 2, 5) #上边缘cv2.line(img_gray, (x, y+h), (x + w, y+h), (0, 0, 255), 2, 5) #下边缘img1[80:230, 90:230] = img_gray #用带有上下轮廓的图替换掉原图的对应部分
5.显示图片
res1=ImgText_CN(img1, ’宽度%d’%h, 25, 25, textColor=(0, 255, 0), textSize=30) #绘制文字#显示图片 cv2.imshow(’original’, res1)key = cv2.waitKey(0)if key==27: #按esc键时,关闭所有窗口 print(key) cv2.destroyAllWindows()
6.完整代码
import cv2import numpy as npfrom PIL import Image, ImageDraw, ImageFont#用于给图片添加中文字符def ImgText_CN(img, text, left, top, textColor=(0, 255, 0), textSize=20): if (isinstance(img, np.ndarray)): #判断是否为OpenCV图片类型 img = Image.fromarray(cv2.cvtColor(img, cv2.COLOR_BGR2RGB)) draw = ImageDraw.Draw(img) fontText = ImageFont.truetype(r’C:WindowsFontssimsun.ttc’, textSize, encoding='utf-8') ##中文字体 draw.text((left, top), text, textColor, font=fontText) #写文字 return cv2.cvtColor(np.asarray(img), cv2.COLOR_RGB2BGR)#实现图片反色功能def PointInvert(img): height, width = img.shape #获取图片尺寸 for i in range(height): for j in range(width): pi = img[i, j] img[i, j] = 255 - pi return imgimg=cv2.imread('gongjian1.bmp',0)#加载彩色图img1=cv2.imread('gongjian1.bmp',1)#加载灰度图recimg = img[80:230, 90:230] #截取需要的部分img2 = img1[80:230, 90:230] #截取需要的部分ret, th = cv2.threshold(recimg, 90, 255, cv2.THRESH_BINARY) #阈值操作二值化# canny边缘检测edges = cv2.Canny(th, 30, 70) res=PointInvert(edges) #颜色反转#显示图片cv2.imshow(’original’, th) #显示二值化后的图,主题为白色,背景为黑色 更加容易找出轮廓key = cv2.waitKey(0)if key==27: #按esc键时,关闭所有窗口 print(key) cv2.destroyAllWindows() contours, hierarchy = cv2.findContours(th, cv2.RETR_EXTERNAL, cv2.CHAIN_APPROX_SIMPLE) #得到轮廓cnt = contours[0]#取出轮廓x, y, w, h = cv2.boundingRect(cnt) #用一个矩形将轮廓包围img_gray = cv2.cvtColor(res, cv2.COLOR_GRAY2BGR)#将灰度转化为彩色图片方便画图cv2.line(img_gray, (x, y), (x + w, y), (0,0,255), 2, 5) #上边缘cv2.line(img_gray, (x, y+h), (x + w, y+h), (0, 0, 255), 2, 5) #下边缘img1[80:230, 90:230] = img_gray #用带有上下轮廓的图替换掉原图的对应部分res1=ImgText_CN(img1, ’宽度%d’%h, 25, 25, textColor=(0, 255, 0), textSize=30) #绘制文字#显示图片 cv2.imshow(’original’, res1)key = cv2.waitKey(0)if key==27: #按esc键时,关闭所有窗口 print(key) cv2.destroyAllWindows()
三、 运行结果(效果)
四、 问题及解决方法
红色轮廓没有显示,解决方案:将灰度图转化为彩色图
以上就是本文的全部内容,希望对大家的学习有所帮助,也希望大家多多支持好吧啦网。
相关文章:
 网公网安备
网公网安备