Python unittest单元测试openpyxl实现过程解析
一。初识单元测试
1)定义:
单元:函数或者是类单元测试:测试类或者函数
python内置的单元测试框架:unittest
2)单元测试的意义
好处:投入小,收益大。能够精准的,更早的发现问题。
3)单元测试与测试关系
python 很难测试 java 的单元。关键是单元测试一般是开发或者测试开发做的。
测试一般会在集成、系统、验收进行测试
4)unittest的注意事项:
1.模块名需要以 test_ 开头
2.类名:以 Test 开头
3.测试用例的方法名称以 test_ 开头
4.单元测试写入方式(其中TestLogin是测试模块):TestLogin(unittest.TestCase)
5)如何写测试用例
#首先需要引入单元测试框架import unittest#login模块校验规则def login(username=None, password=None): '''登录''' if (not username) or (not password): # 用户名或者密码为空 return {'msg': 'empty'} if username == ’yuz’ and password == ’123456’: # 正确的用户名和密码 return {'msg': 'success'} return {'msg': 'error'}#单元测试用例class TestLogin(unittest.TestCase): def setUp(self): pass def tearDown(self): pass #登录账号与密码为空 def test_login_01_null(self): username=’’ password=’’ expected_result={'msg': 'empty'} actual_result=login(username,password) self.assertTrue(expected_result == actual_result) #登录账号为空 def test_login_02_usernull(self): username=’’ password=’123456’ expected_result={'msg': 'empty'} actual_result=login(username,password) self.assertTrue(expected_result == actual_result) #登录密码为空 def test_login_03_passwordnull(self): username=’yuz’ password=’’ expected_result={'msg': 'empty'} actual_result=login(username,password) self.assertTrue(expected_result == actual_result) #正常登录 def test_login_04_correct(self): username = ’yuz’ password = ’123456’ expected_result = {'msg': 'success'} actual_result = login(username, password) self.assertEqual(expected_result,actual_result) #账号输入错误 def test_login_05_usererro(self): username = ’linzai’ password = ’123456’ expected_result = {'msg': 'error'} actual_result = login(username, password) self.assertTrue(expected_result == actual_result) #密码输入错误 def test_login_06_usererro(self): username = ’yuz’ password = ’12345698’ expected_result = {'msg': 'error'} actual_result = login(username, password) self.assertTrue(expected_result == actual_result) #账号与密码都错误 def test_login_07_userpassworderror(self): username=’linzai’ password=’laksls’ expected_result={'msg': 'error'} actual_result=login(username,password) self.assertTrue(expected_result == actual_result)#执行方法if __name__ == ’__main__’: unittest.main()
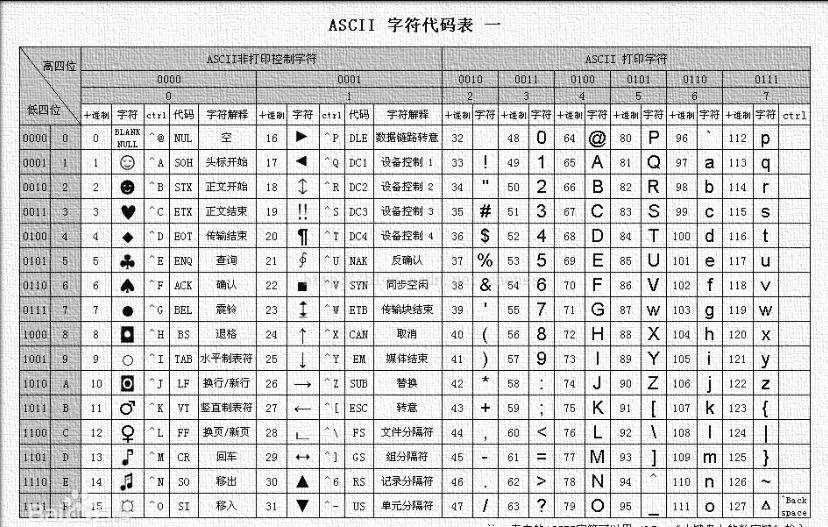
6)测试用例执行顺序
采取ASCII标准按顺序进行执行
二。单元深入了解。(用例执行、组织、收集、运行流程)
1。用例执行
1)右击 unittest 运行(在.py文件中) 2)python 运行 unittest.main() 3) 运行所有的测试用例(控制台直接执行 : python test...py)2.用例组织
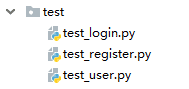
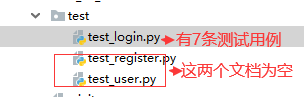
会把测试用例的代码放到一个统一的文件夹当中或者目录当中。
如下:
3.测试用例收集
需要把每个测试用例模块当中的测试用例收集到一起,一起执行。
1)方法一:(创建一个测试用例加载器,使用discover 收集所有用例)
#初始化一个测试用例加载器loder=unittest.TestLoader()#先拿到该.py文件的绝对路径file_path=os.path.abspath(__file__)#拿到测试模块的路径case_path=os.path.join(os.path.dirname(file_path),’test’)#使用loder收集所有的测试用例test_suit=loder.discover(case_path)print(test_suit)
运行结果(discover收集的内容是一个列表,如下图):

[<unittest.suite.TestSuite tests=[<unittest.suite.TestSuite tests=[<test_login.TestLogin testMethod=test_login_01_null>, <test_login.TestLogin testMethod=test_login_02_usernull>, <test_login.TestLogin testMethod=test_login_03_passwordnull>, <test_login.TestLogin testMethod=test_login_04_correct>, <test_login.TestLogin testMethod=test_login_05_usererro>, <test_login.TestLogin testMethod=test_login_06_usererro>, <test_login.TestLogin testMethod=test_login_07_userpassworderror>]>]>, <unittest.suite.TestSuite tests=[]>, <unittest.suite.TestSuite tests=[]>]>
2)方法二(创建一个测试用例加载器loder,加载测试用例创建测试集并对用例进行添加):
from class_16_unittest单元测试集及报告.test import test_login,test_registerloder=unittest.TestLoader()case_path=os.path.join(os.path.dirname(os.path.abspath(__file__)),’test’)#加载测试用例suite_login=loder.loadTestsFromModule(test_login)suite_register=loder.loadTestsFromModule(test_register)#初始化一个测试集合 suitesuite_total=unittest.TestSuite()#添加测试用例suite_total.addTest(suite_login)suite_total.addTest(test_register)
4.运行流程
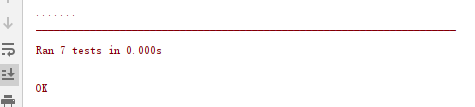
1)执行方法一,没有测试报告(使用的是测试用例收集方法二进行的执行):
runner = unittest.TextTestRunner()runner.run(suite_total)
运行结果:
2)执行方法二,有测试报告:
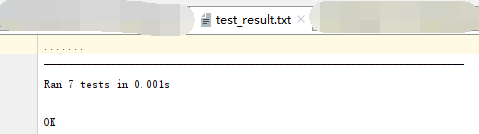
1.自带的测试报告(TextTestRunner)
with open('test_result.txt',’w’,encoding=’utf-8’) as f: runner = unittest.TextTestRunner(f) runner.run(suite_total)
运行结果:

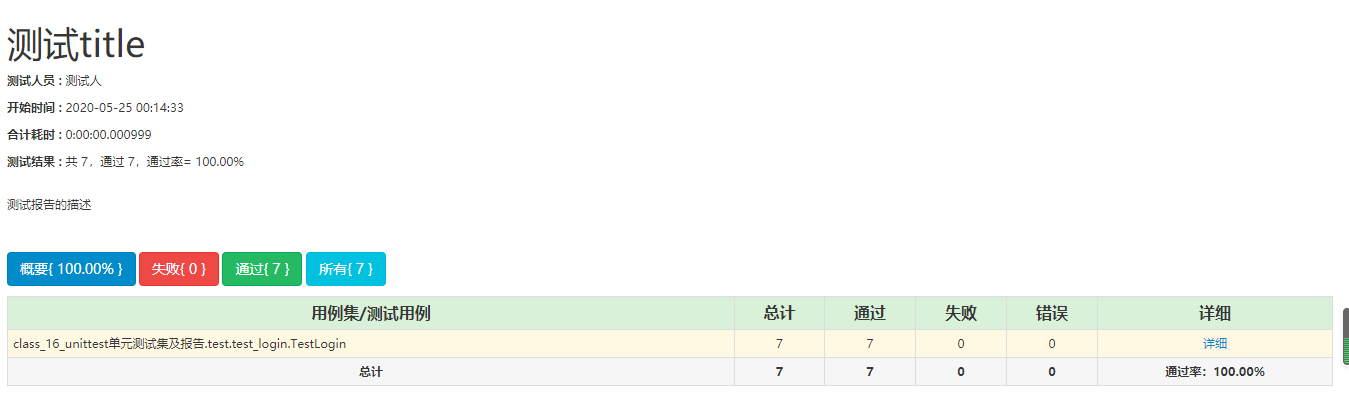
2.HTMLTestRunner(测试报告模板)
with open('test_result.html',’wb’) as f: runner = HTMLTestRunner(f, title=’测试title’, description='测试报告的描述', tester=’测试人’ ) runner.run(suite_total)
运行结果:[/code]

三。openpyxl
1.安装与使用范围
安装:pip install openpyxl
范围(2003年后):xlsx
xls格式:需要用xlrd, xlwt
2.使用
导入
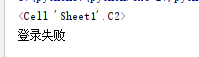
import openpyxlfrom openpyxl.worksheet.worksheet import Worksheet#打开文件workbook=openpyxl.load_workbook(’cases.xlsx’)# print(workbook)#获取表单名1)#sheet : Worksheet 可以获取到 对应得表单名字sheet : Worksheet=workbook[’Sheet1’]# print(sheet)2)#方法二,通过表单名或者排列顺序获得操作表单sheet=workbook[’Sheet1’]#根据位置获取操作表单名称sheet=workbook.worksheets[0]#获取数据1)#根据表单行列获取表单对象,row:行 column:列cell=sheet.cell(row=2,column=3)print(cell)#获取表单数据print(cell.value)运行结果:excel表信息:

2)#根据最大行列,进行获取数据,使用嵌套循环的方法把表单数据一行一行的化为列表返回
注意:

#获取表单的最大行数row_max=sheet.max_row#获取最大列数cloumn_max=sheet.max_column#使用嵌套循环的方式,精准的拿到每一个坐标的对象,然后转化为值row_data=[]for row in range(1,row_max+1): cloumn_data=[] for cloumn in range(1,cloumn_max+1): #print(sheet.cell(row,cloumn)) cloumn_data.append(sheet.cell(row,cloumn).value) row_data.append(cloumn_data)print(row_data)#运行结果:

3)#根据最大行列,进行获取数据,使用嵌套循环的方法把表单数据一行一行的化为dict返回
#获取第一行表单对象sheet[1]#可以与切片一起获取固定行的对象sheet[1:]row_data=[]#获取第一行的所有值header=[c.value for c in sheet[1]]for row in range(2,row_max+1): cloumn_data=[] for cloumn in range(1,cloumn_max+1): #print(sheet.cell(row,cloumn)) cloumn_data.append(sheet.cell(row,cloumn).value) #print(cloumn_data) #使用zip函数把header与一行一行数据进行 分组并返回 tuple对象,然后使用dict转化为字典 dict_data=dict(zip(header,cloumn_data)) row_data.append(dict_data)print(row_data)
运行结果:

以上就是本文的全部内容,希望对大家的学习有所帮助,也希望大家多多支持好吧啦网。
相关文章:
 网公网安备
网公网安备