python之用Numpy和matplotlib画一个魔方
瞎鼓捣系列~Numpy + matplotlib 画一个魔方
前言NumPy是Python科学计算的基本包。它是一个Python库,提供了多维数组对象、各种派生对象(如掩码数组和矩阵),以及用于对数组进行快速操作的各种例程,包括数学、逻辑、形状操作、排序、选择、I/O、离散傅里叶变换、基本线性代数、基本的统计运算,随机模拟等等。github官方文档
最近项目中有个码垛规划的需求,Numpy中的三维数组特别好用,就鼓捣了一下。然后我看到桌子上两年前买的魔方,好久没玩儿过了。头脑一热,就想用Numpy画个魔方出来!
这里选择使用Matplotlib作为可视化工具Matplotlib GitHubMatplotlib 官方文档
构建体素为了制作魔方,主要用到Matplotlib中的一个函数voxels
voxels([x, y, z, ]/, filled, facecolors=None, edgecolors=None, **kwargs)绘制一组填充体素所有体素在坐标轴上绘制为1x1x1立方体,filled[0, 0, 0]的lower corner位于原点。被遮挡的面不再绘制。
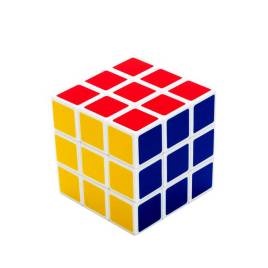
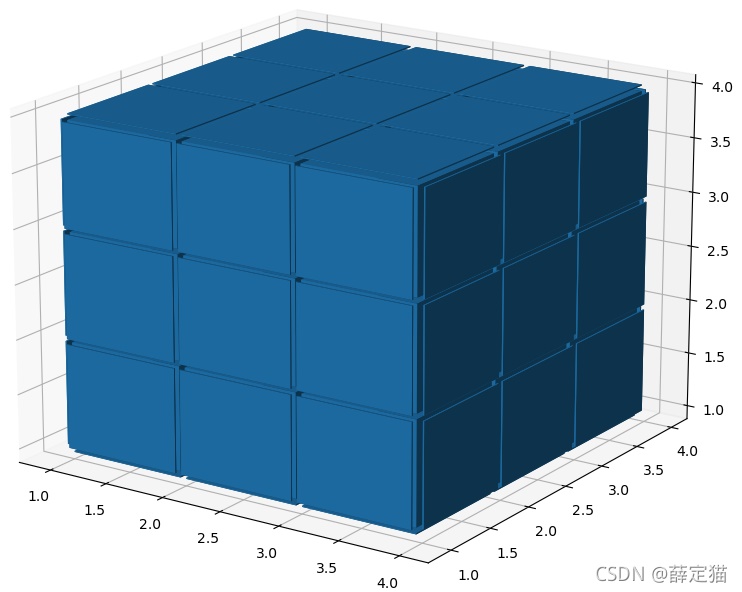
以3x3x3魔方为例:
import matplotlib.pyplot as pltimport numpy as np# 准备一组体素坐标n_voxels = np.ones((3, 3, 3), dtype=bool)# 绘制ax = plt.figure().add_subplot(projection=’3d’)ax.voxels(n_voxels)plt.show()
可以看到,虽然出现了3x3x3个体素,但是体素与体素之间的没有间隙,看起来不是很美观。
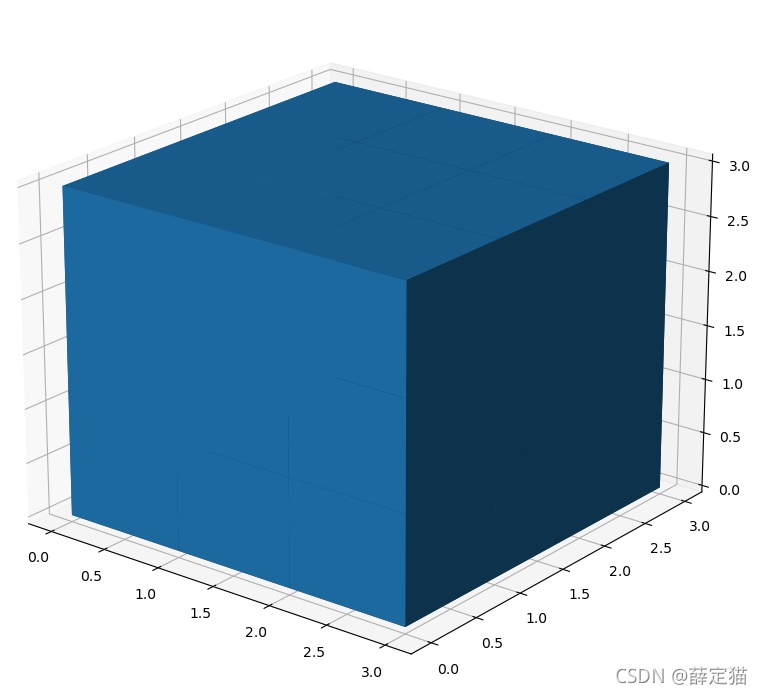
制作间隙效果为了让体素与体素之间有间隙,可以对3x3x3的体素进行上采样,即构建一个5x5x5的体素,这样在每一个维度,让处于两个体素中间的体素不显示,即可产生间隙的效果。
size = np.array(n_voxels.shape) * 2filled_2 = np.zeros(size - 1, dtype=n_voxels.dtype)filled_2[::2, ::2, ::2] = n_voxelsax = plt.figure().add_subplot(projection=’3d’)ax.voxels(filled_2)plt.show()
这样间隙有了,但是间隙太大了,此时可以使用voxels函数的可选参数[x, y, z]控制每一个voxel的顶点位置,进而控制间隙的大小
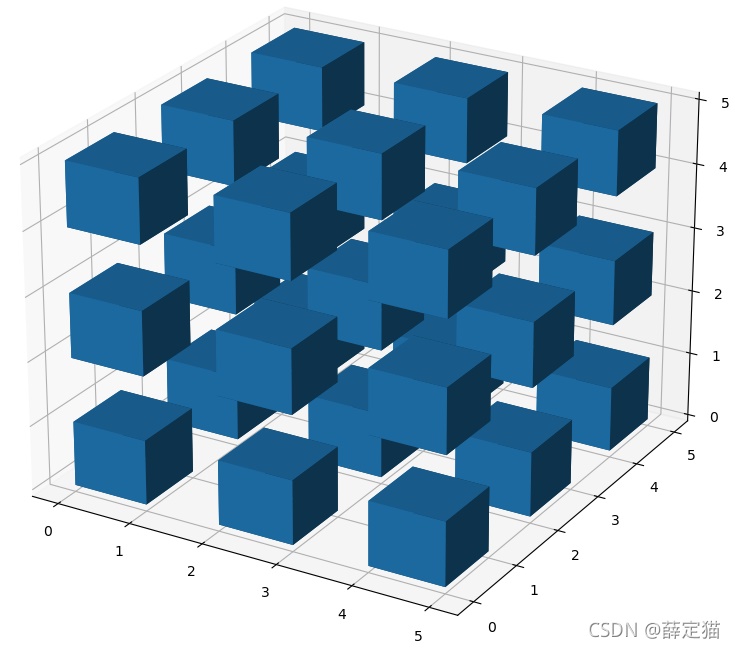
# 缩小间隙# 构建voxels顶点控制网格# x, y, z均为6x6x6的矩阵,为voxels的网格# //2是为了,把索引范围从[0 1 2 3 4 5]转换为[0 0 1 1 2 2],这样x,y,z范围就回到了0~3x, y, z = np.indices(np.array(filled_2.shape) + 1).astype(float) // 2 x[1::2, :, :] += 0.95y[:, 1::2, :] += 0.95z[:, :, 1::2] += 0.95
这样间隙就看起来差不多了,接下来就是为魔方的六个面添加颜色了。
为每个面赋不同的颜色由于只能给每个体素整体一个颜色,不能对一个体素的不同面指定不同的颜色,所以为了实现六个面不同颜色,只能将3x3x3的矩阵改为5x5x5,将最外边的那一层体素厚度设小一点,近似于面,然后赋颜色。
import matplotlib.pyplot as pltimport numpy as np# 准备一些坐标n_voxels = np.ones((5, 5, 5), dtype=bool)# 生成间隙size = np.array(n_voxels.shape) * 2filled_2 = np.zeros(size - 1, dtype=n_voxels.dtype)filled_2[::2, ::2, ::2] = n_voxels# 缩小间隙# 构建voxels顶点控制网格# x, y, z均为6x6x8的矩阵,为voxels的网格,3x3x4个小方块,共有6x6x8个顶点。# 这里//2是精髓,把索引范围从[0 1 2 3 4 5]转换为[0 0 1 1 2 2],这样就可以单独设立每个方块的顶点范围x, y, z = np.indices(np.array(filled_2.shape) + 1).astype(float) //2 # 3x6x6x8,其中x,y,z均为6x6x8x[1::2, :, :] += 0.95y[:, 1::2, :] += 0.95z[:, :, 1::2] += 0.95# 修改最外面的体素的厚度,作为六个面来使用x[0, :, :] += 0.94y[:, 0, :] += 0.94z[:, :, 0] += 0.94x[-1, :, :] -= 0.94y[:, -1, :] -= 0.94z[:, :, -1] -= 0.94# 去除边角料filled_2[0, 0, :] = 0filled_2[0, -1, :] = 0filled_2[-1, 0, :] = 0filled_2[-1, -1, :] = 0filled_2[:, 0, 0] = 0filled_2[:, 0, -1] = 0filled_2[:, -1, 0] = 0filled_2[:, -1, -1] = 0filled_2[0, :, 0] = 0filled_2[0, :, -1] = 0filled_2[-1, :, 0] = 0filled_2[-1, :, -1] = 0
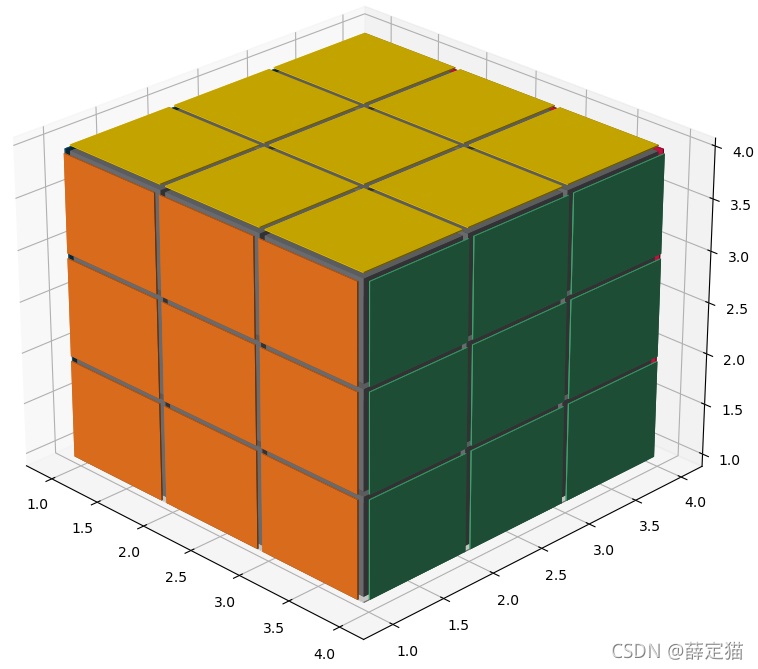
然后就是给六个面赋不同的颜色了。
六个方向表示:上(up)、下(down)、左(left)、右(right)、前(front)、后(back)六种颜色表示:黄色(yellow)、白色(white)、橙色(orange)、红色(red)、蓝色(blue)、绿色(green)初始的魔方组成形式为:上黄,下白,左橙,右红,前蓝,后绿。
参考:颜色大全https://www.5tu.cn/colors/yansebiao.html
# 给魔方六个面赋予不同的颜色colors = np.array([’#ffd400’, '#fffffb', '#f47920', '#d71345', '#145b7d', '#45b97c'])facecolors = np.full(filled_2.shape, ’#77787b’) # 设一个灰色的基调facecolors[:, :, -1] = colors[0]facecolors[:, :, 0] = colors[1]facecolors[:, 0, :] = colors[2]facecolors[:, -1, :] = colors[3]facecolors[0, :, :] = colors[4]facecolors[-1, :, :] = colors[5]
完整 代码如下:
# -*- coding: utf-8 -*-# @Time : DATE:2021/8/29# @Author : yan# @Email : 1792659158@qq.com# @File : blogDemo.pyimport matplotlib.pyplot as pltimport numpy as npdef generate_rubik_cube(nx, ny, nz): ''' 根据输入生成指定尺寸的魔方 :param nx: :param ny: :param nz: :return: ''' # 准备一些坐标 n_voxels = np.ones((nx + 2, ny + 2, nz + 2), dtype=bool) # 生成间隙 size = np.array(n_voxels.shape) * 2 filled_2 = np.zeros(size - 1, dtype=n_voxels.dtype) filled_2[::2, ::2, ::2] = n_voxels # 缩小间隙 # 构建voxels顶点控制网格 # x, y, z均为6x6x8的矩阵,为voxels的网格,3x3x4个小方块,共有6x6x8个顶点。 # 这里//2是精髓,把索引范围从[0 1 2 3 4 5]转换为[0 0 1 1 2 2],这样就可以单独设立每个方块的顶点范围 x, y, z = np.indices(np.array(filled_2.shape) + 1).astype(float) // 2 # 3x6x6x8,其中x,y,z均为6x6x8 x[1::2, :, :] += 0.95 y[:, 1::2, :] += 0.95 z[:, :, 1::2] += 0.95 # 修改最外面的面 x[0, :, :] += 0.94 y[:, 0, :] += 0.94 z[:, :, 0] += 0.94 x[-1, :, :] -= 0.94 y[:, -1, :] -= 0.94 z[:, :, -1] -= 0.94 # 去除边角料 filled_2[0, 0, :] = 0 filled_2[0, -1, :] = 0 filled_2[-1, 0, :] = 0 filled_2[-1, -1, :] = 0 filled_2[:, 0, 0] = 0 filled_2[:, 0, -1] = 0 filled_2[:, -1, 0] = 0 filled_2[:, -1, -1] = 0 filled_2[0, :, 0] = 0 filled_2[0, :, -1] = 0 filled_2[-1, :, 0] = 0 filled_2[-1, :, -1] = 0 # 给魔方六个面赋予不同的颜色 colors = np.array([’#ffd400’, '#fffffb', '#f47920', '#d71345', '#145b7d', '#45b97c']) facecolors = np.full(filled_2.shape, ’#77787b’) # 设一个灰色的基调 # facecolors = np.zeros(filled_2.shape, dtype=’U7’) facecolors[:, :, -1] = colors[0]# 上黄 facecolors[:, :, 0] = colors[1] # 下白 facecolors[:, 0, :] = colors[2] # 左橙 facecolors[:, -1, :] = colors[3]# 右红 facecolors[0, :, :] = colors[4] # 前蓝 facecolors[-1, :, :] = colors[5]# 后绿 ax = plt.figure().add_subplot(projection=’3d’) ax.voxels(x, y, z, filled_2, facecolors=facecolors) plt.show()if __name__ == ’__main__’: generate_rubik_cube(3, 3, 3)
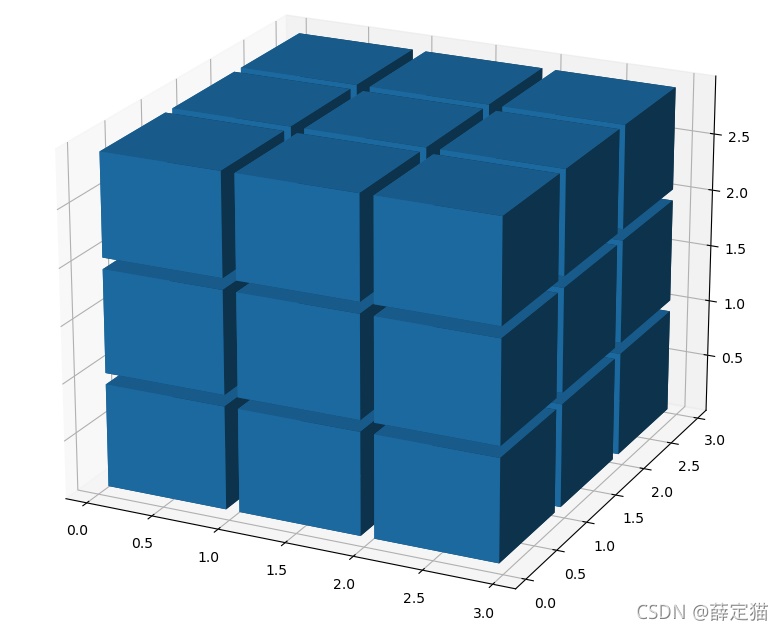
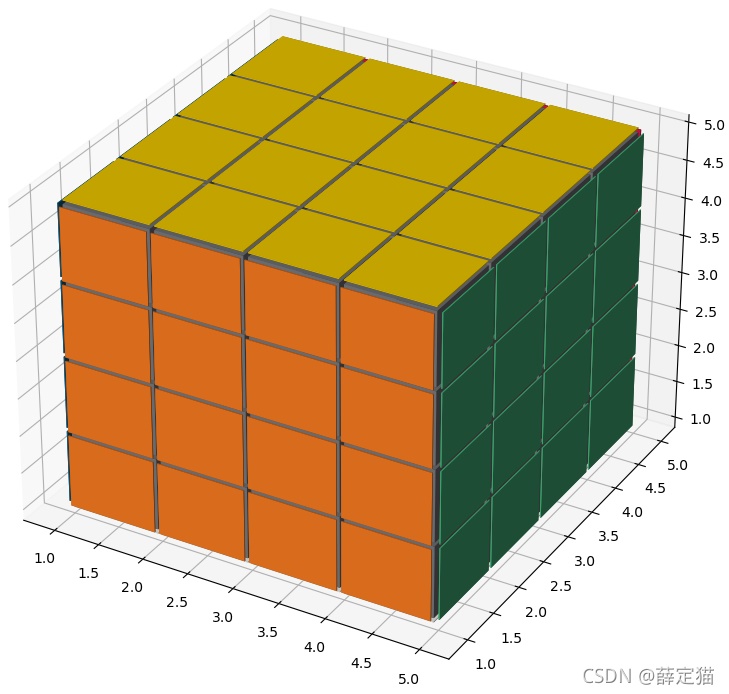
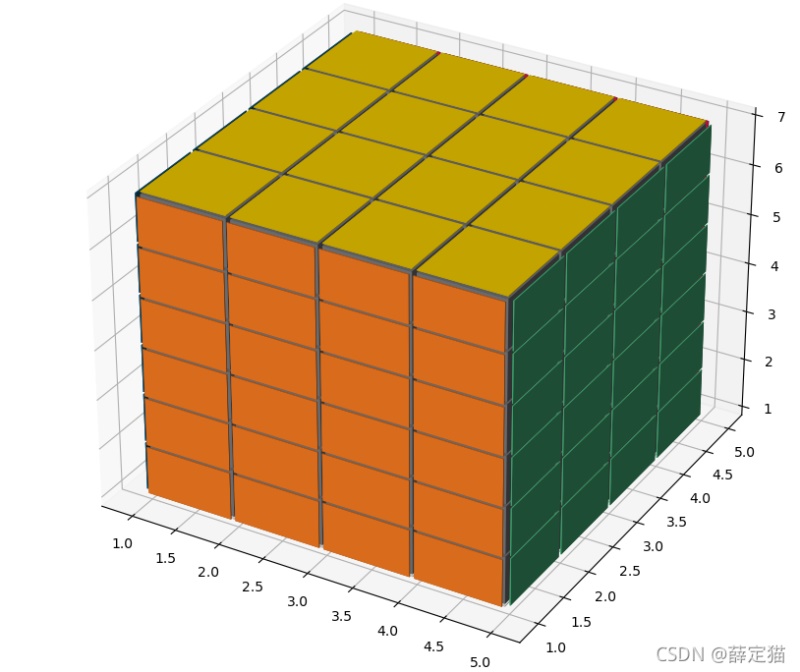
可根据输入生成不同尺寸的魔方:4x4x4:
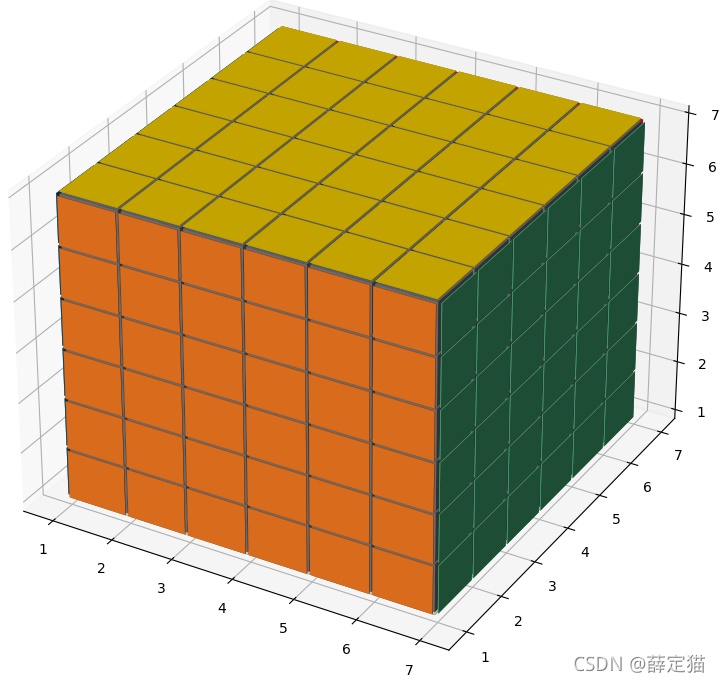
6x6x6
甚至是4x4x6,不过这就不是咱平时玩儿的魔方了~
到此这篇关于python之用Numpy和matplotlib画一个魔方的文章就介绍到这了,更多相关Numpy matplotlib画魔方内容请搜索好吧啦网以前的文章或继续浏览下面的相关文章希望大家以后多多支持好吧啦网!
相关文章:

 网公网安备
网公网安备