Android自定义流式布局的实现示例
在日常的app使用中,我们会在android 的app中看见 热门标签等自动换行的流式布局,今天,我们就来看看如何自定义一个类似热门标签那样的流式布局。下面我们就来详细介绍流式布局的应用特点以及用的的技术点。
1.流式布局的特点以及应用场景特点:当上面一行的空间不够容纳新的TextView时候,才开辟下一行的空间。
原理图:
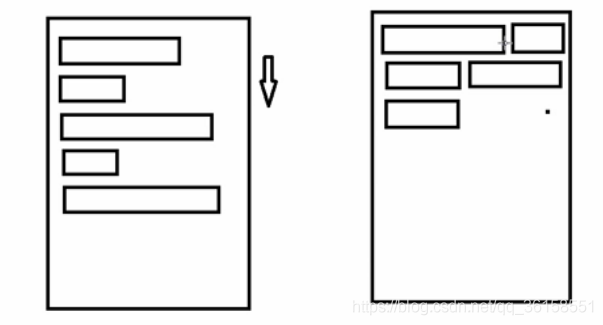
场景:主要用于关键词搜索或者热门标签等场景
2.自定义ViewGroup(1)onMeasure:测量子view的宽高,设置自己的宽和高(2)onLayout:设置子view的位置onMeasure:根据子view的布局文件中属性,来为子view设置测量模式和测量值测量=测量模式+测量值;
测量模式有3种:
EXACTLY:表示设置了精确的值,一般当childView设置其宽、高为精确值、match_parent时,ViewGroup会将其设置为EXACTLY; AT_MOST:表示子布局被限制在一个最大值内,一般当childView设置其宽、高为wrap_content时,ViewGroup会将其设置为AT_MOST; UNSPECIFIED:表示子布局想要多大就多大,一般出现在AadapterView的item的heightMode中、ScrollView的childView的heightMode中;此种模式比较少见。(3)LayoutParams
ViewGroup LayoutParams :每个 ViewGroup 对应一个 LayoutParams; 即 ViewGroup -> LayoutParams getLayoutParams 不知道转为哪个对应的LayoutParams ,其实很简单,就是如下: 子View.getLayoutParams 得到的LayoutParams对应的就是 子View所在的父控件的LayoutParams;例如,LinearLayout 里面的子view.getLayoutParams ->LinearLayout.LayoutParams。所以 咱们的FlowLayout 也需要一个LayoutParams,由于上面的效果图是子View的 margin,所以应该使用MarginLayoutParams。即FlowLayout->MarginLayoutParams
3.代码FlowLayoutView
/** * Created by zzs on 20/01/16. * 流式布局 */public class FlowLayoutView extends ViewGroup{ public FlowLayoutView(Context context) { super(context); } public FlowLayoutView(Context context, AttributeSet attrs) { super(context, attrs); } //或ViewGroup中所有子元素的属性 //否则只获取ViewGroup 的属性 @Override public LayoutParams generateLayoutParams(AttributeSet attrs) { return new MarginLayoutParams(getContext(),attrs); } /** * 测量控件本身的大小 宽和高 根据子内容获取 * @param widthMeasureSpec * @param heightMeasureSpec */ @Override protected void onMeasure(int widthMeasureSpec, int heightMeasureSpec) { super.onMeasure(widthMeasureSpec, heightMeasureSpec); //获取父布局的模式和尺寸 int sizeWidth = MeasureSpec.getSize(widthMeasureSpec); int modeWidth = MeasureSpec.getMode(widthMeasureSpec); int sizeHeight = MeasureSpec.getSize(heightMeasureSpec); int modeHeight = MeasureSpec.getMode(heightMeasureSpec); //记录Wrap_content的宽高 int width = 0; int height = 0; //没一行的宽和高 int lineWidth = 0; int lineHeight =0; //获取子元素的数量 int cCount = getChildCount(); //进行遍历子元素 for(int i=0;i<cCount;i++){ //获取每一个子元素 View child = getChildAt(i); //测量每一个子元素 measureChild(child,widthMeasureSpec,heightMeasureSpec); //获取每个子元素的属性 MarginLayoutParams layoutParams = (MarginLayoutParams) child.getLayoutParams(); //获取当前子元素的宽和高 int childWidth = child.getMeasuredWidth()+layoutParams.leftMargin+layoutParams.rightMargin; int childHeight = child.getMeasuredHeight()+layoutParams.bottomMargin+layoutParams.topMargin; if(lineWidth+childWidth>getWidth()-getPaddingLeft()-getPaddingRight()){//换行 width = Math.max(lineWidth,childWidth); lineWidth = childWidth;//重新开一行 当前行的宽度 //叠加之前的高度 height += lineHeight; //重新开一行 这个新行的高度 lineHeight = childHeight; }else{//不换行 //记录当前行的宽 lineWidth += childWidth; //记录一行中的高度 lineHeight = Math.max(lineHeight,childHeight); } if(i ==cCount-1){//判断是否是最后一个元素 width = Math.max(width,lineWidth); height += lineHeight; } //设置ViewGrop最终宽高 setMeasuredDimension(modeWidth==MeasureSpec.EXACTLY?sizeWidth:width+getPaddingRight()+getPaddingLeft(),modeHeight==MeasureSpec.EXACTLY?sizeHeight:height+getPaddingBottom()+getPaddingTop()); } } //记录所有子元素 按行存取 List<List<View>> mAllViews = new ArrayList<>(); //记录每一行中最大的高度 private List<Integer> mLineHeight = new ArrayList<>(); //摆放子View ??????????????? @Override protected void onLayout(boolean changed, int l, int t, int r, int b) { //为了多次执行时 数据正确 mAllViews.clear(); mLineHeight.clear(); //获取父控件的宽度 int width = getWidth(); //记录一行中的宽和高 int lineWidth = 0; int lineHeight = 0; //记录一行中的 View List<View> lineView = new ArrayList<>(); //获取子元素的个数 int cCount = getChildCount(); Log.e('AAA','==AAAA=>'+cCount); //遍历所有子元素 for(int i=0;i<cCount;i++){ View child = getChildAt(i); //获取每个子元素的属性 MarginLayoutParams layoutParams = (MarginLayoutParams) child.getLayoutParams(); //获取当前子元素的宽和高 int childWidth = child.getMeasuredWidth()+layoutParams.leftMargin+layoutParams.rightMargin; int childHeight = child.getMeasuredHeight()+layoutParams.bottomMargin+layoutParams.topMargin; if(lineWidth+childWidth>width-getPaddingLeft()-getPaddingRight()){//判断是否换行 //记录一行的高 和一行中的View mLineHeight.add(lineHeight); mAllViews.add(lineView); Log.e('AAA','==>VVV===>'+mAllViews.size()); //让数据重置 lineWidth = 0; lineView = new ArrayList<>(); }else{ //记录一行中的宽 高 view lineWidth += childWidth; lineHeight = Math.max(lineHeight,childHeight); lineView.add(child); } }//处理元素 数据以每行的形式处理 mLineHeight.add(lineHeight); mAllViews.add(lineView); //获取每个View的padding int left = getPaddingLeft(); int top = getPaddingTop(); //获取有多少行 int lineNum = mAllViews.size(); Log.e('AAA','=BBB=>'+lineNum); //展示每一行 for(int i=0;i<lineNum;i++){ lineHeight = mLineHeight.get(i); lineView = mAllViews.get(i); //遍历每一行 // 取出 每一行的 所有的View lineView = mAllViews.get(i); lineHeight = mLineHeight.get(i); // 循环遍历 每一行的View for(int j=0;j<lineView.size();j++){ View child = lineView.get(j); MarginLayoutParams lp = (MarginLayoutParams) child.getLayoutParams(); int lc = left+lp.leftMargin; int tc = top+lp.topMargin; int rc = lc+child.getMeasuredWidth(); int bc = tc+child.getMeasuredHeight(); //摆放 子View的位置 child.layout(lc, tc, rc, bc); //叠加 前一个View 的 实际宽度 left += child.getMeasuredWidth()+lp.leftMargin+lp.rightMargin; } //换行了 重置 left = getPaddingLeft(); top+=lineHeight; } }}
MainActivity
public class MainActivity extends AppCompatActivity { private FlowLayoutView flowLayoutView; private String[] titils = {'sds', 'da', 'aa', 'fff', 'gggggg', 'hhgghg', 'jjhhhh', 'aaaaaaaaaaaaaaaaaaaaaaaaaaa', 'fff', 'gggggg', 'hhgghg', 'jjhhhh', 'sds', 'da', 'aa', 'fff', 'gggggg', 'sds', 'da', 'aa', 'fff', 'gggggg'}; @Override protected void onCreate(Bundle savedInstanceState) { super.onCreate(savedInstanceState); setContentView(R.layout.activity_main); flowLayoutView = findViewById(R.id.flowLayoutView); for (int i = 0; i < titils.length; i++) { TextView tv = (TextView) LayoutInflater.from(MainActivity.this) .inflate(R.layout.lv_item, flowLayoutView, false); tv.setText(titils[i]); flowLayoutView.addView(tv); } }}
activity_main
<?xml version='1.0' encoding='utf-8'?><LinearLayout xmlns:android='http://schemas.android.com/apk/res/android' xmlns:app='http://schemas.android.com/apk/res-auto' xmlns:tools='http://schemas.android.com/tools' android:layout_width='match_parent' android:layout_height='match_parent' android:orientation='vertical' tools:context='.MainActivity'> <com.zzs.polygon.FlowLayoutView android: android:layout_width='match_parent' android:layout_height='wrap_content' /></LinearLayout>
lv_item
<?xml version='1.0' encoding='utf-8'?><TextView xmlns:android='http://schemas.android.com/apk/res/android' android:layout_width='wrap_content' android:layout_height='wrap_content' android:background='@drawable/tv_shape' android:paddingLeft='10dp' android:paddingTop='5dp' android:paddingRight='10dp' android:paddingBottom='5dp' android:layout_marginLeft='10dp' android:layout_marginBottom='5dp' android:layout_marginRight='10dp' android:layout_marginTop='5dp' android:text='AAA' android:textColor='#ff0000'></TextView>
drawable / tv_shape.xml
<?xml version='1.0' encoding='utf-8'?><shape xmlns:android='http://schemas.android.com/apk/res/android'> <corners android:radius='30dp'></corners> <solid android:color='#8800ff00'></solid> <padding android:left='10dp' android:right='10dp' android:top='10dp' android:bottom='10dp' ></padding></shape></TextView>
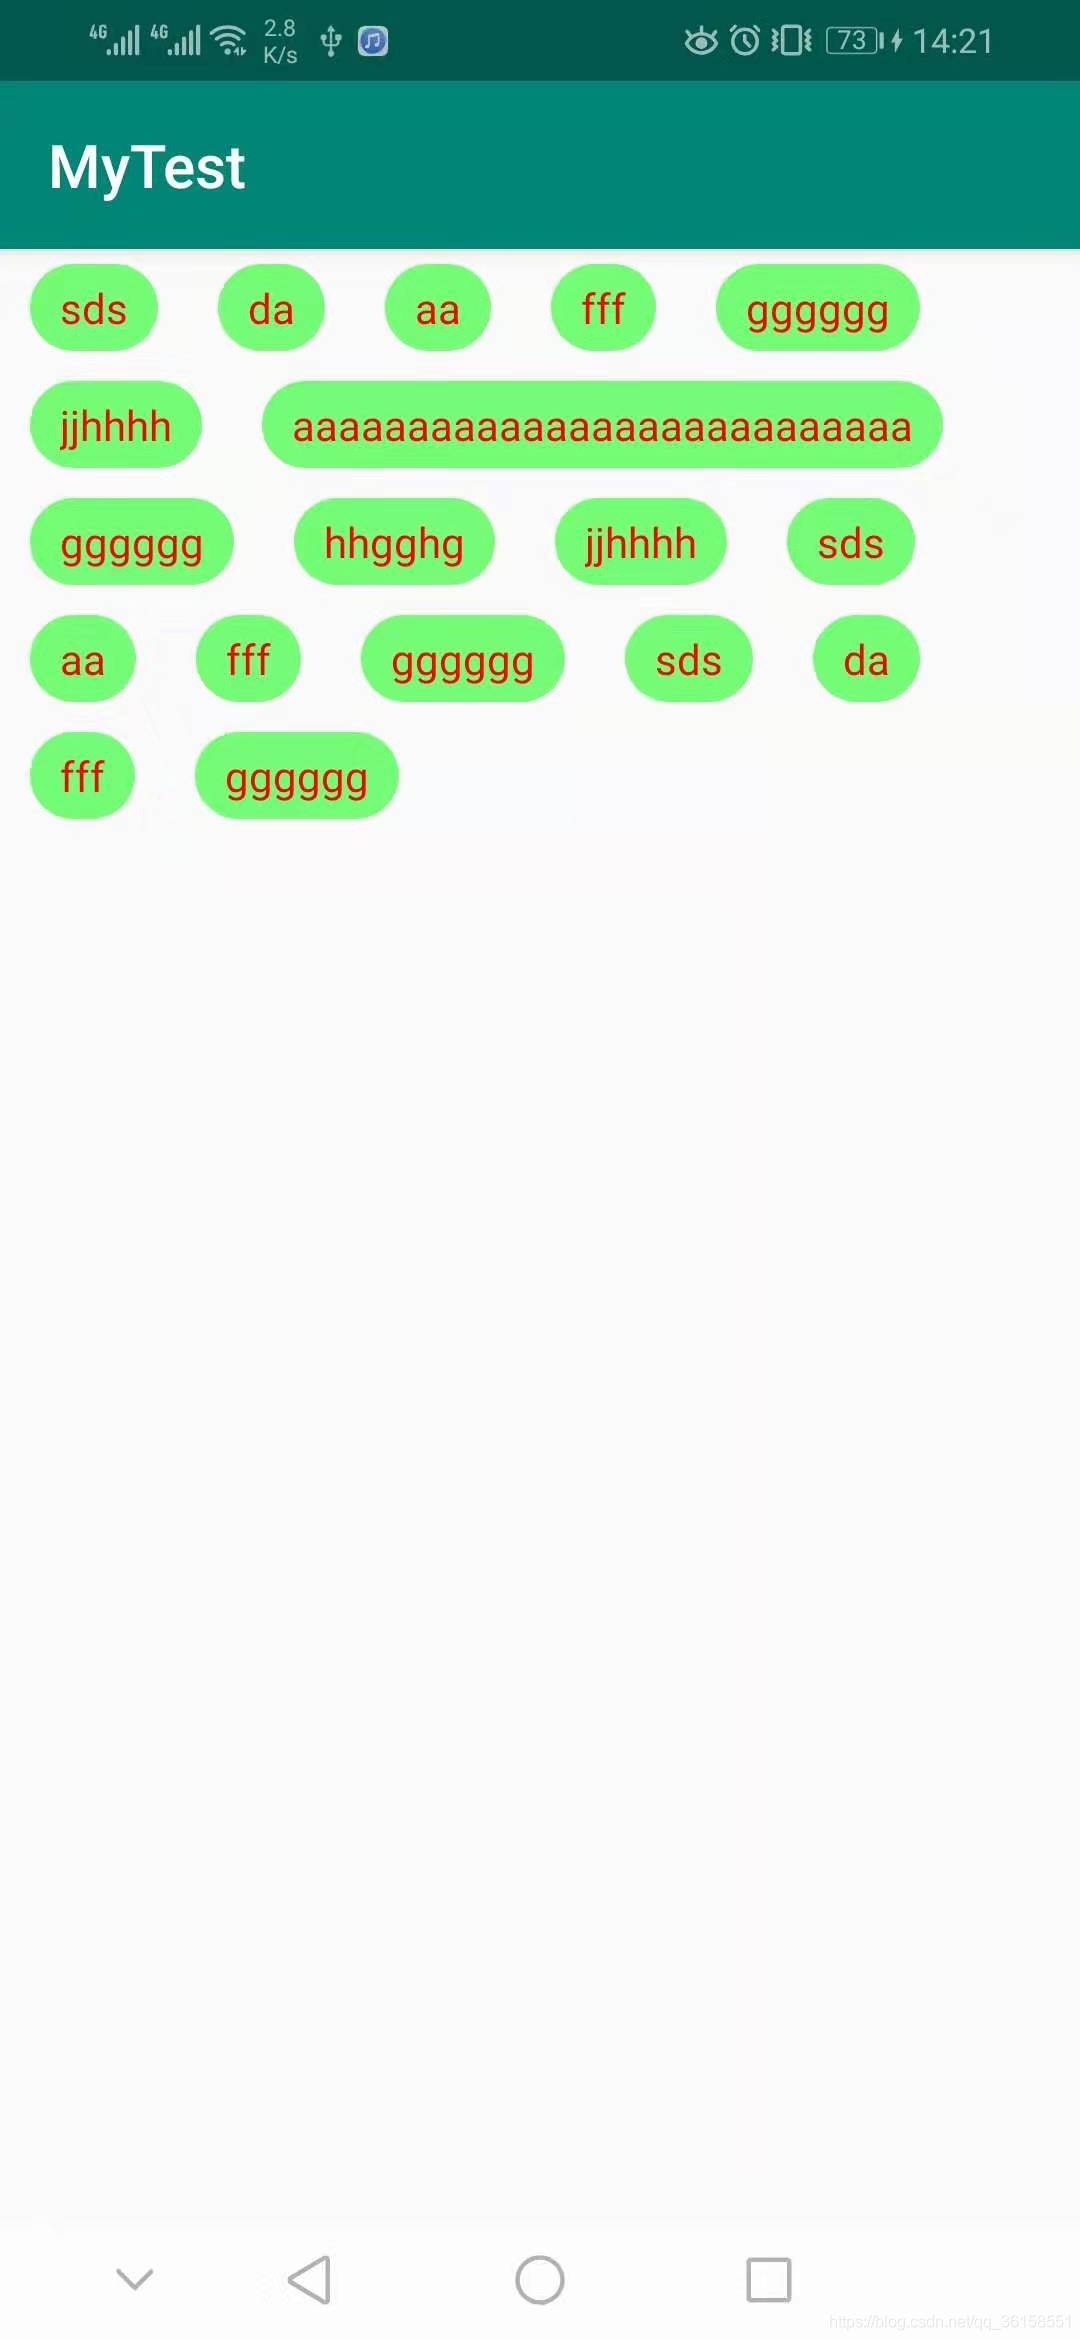
效果图
到此这篇关于Android自定义流式布局的实现示例的文章就介绍到这了,更多相关Android 自定义流式布局内容请搜索好吧啦网以前的文章或继续浏览下面的相关文章希望大家以后多多支持好吧啦网!
相关文章:
 网公网安备
网公网安备