Vue2模版编译流程详解

为了更好理解 vue 的模板编译这里我整理了一份模板编译的整体流程,如下所示,下面将用源码解读的方式来找到模板编译中的几个核心步骤,进行详细说明:

这里我使用 webpack 来打包 vue 文件,来分析 vue 在模板编译中的具体流程,如下所示,下面是搭建的项目结构和文件内容:
项目结构├─package-lock.json├─package.json├─src| ├─App.vue| └index.js├─dist| └main.js├─config| └webpack.config.jsApp.vue<template> <div id='box'> {{ count }} </div></template><script>export default { props: {}, data() { return { count: 0 } }}</script><style scoped>#box { background: red;}</style>webpack.config.jsconst { VueLoaderPlugin } = require('vue-loader')module.exports = { mode: 'development', module: { rules: [ { test: /.vue$/, loader: 'vue-loader' }, // 它会应用到普通的 `.js` 文件 // 以及 `.vue` 文件中的 `<script>` 块 { test: /.js$/, loader: 'babel-loader' }, // 它会应用到普通的 `.css` 文件 // 以及 `.vue` 文件中的 `<style>` 块 { test: /.css$/, use: [ 'vue-style-loader', 'css-loader' ] } ] }, plugins: [ new VueLoaderPlugin() ]}如上 webpack.config.js 所示,webpack 可以通过 vue-loader 识别 vue 文件,vue-loader 是 webpack 用来解析 .vue 文件的 loader,主要作用是将单文件组件(SFC),解析成为 webpack 可识别的 JavaScript 模块。
打包构建搭建好整个目录项目后,执行 npm run build ,会将 vue 文件解析打包成对应的 bundle,并输出至 dist 目录下,下面是打包后的产出,对应 App.vue 的产物:
/***/ './src/App.vue'__webpack_require__.r(__webpack_exports__);/* harmony export */ __webpack_require__.d(__webpack_exports__, { /* harmony export */ 'default': () => (__WEBPACK_DEFAULT_EXPORT__) \n/* harmony export */});var _App_vue_vue_type_template_id_7ba5bd90_scoped_true___WEBPACK_IMPORTED_MODULE_0__ = __webpack_require__('./src/App.vue?vue&type=template&id=7ba5bd90&scoped=true&');var _App_vue_vue_type_script_lang_js___WEBPACK_IMPORTED_MODULE_1__ = __webpack_require__( './src/App.vue?vue&type=script&lang=js&');var _node_modules_vue_loader_lib_runtime_componentNormalizer_js__WEBPACK_IMPORTED_MODULE_2__ = __webpack_require__('./node_modules/vue-loader/lib/runtime/componentNormalizer.js');var component = (0, _node_modules_vue_loader_lib_runtime_componentNormalizer_js__WEBPACK_IMPORTED_MODULE_2__['default'])( _App_vue_vue_type_script_lang_js___WEBPACK_IMPORTED_MODULE_1__['default'], _App_vue_vue_type_template_id_7ba5bd90_scoped_true___WEBPACK_IMPORTED_MODULE_0__.render, _App_vue_vue_type_template_id_7ba5bd90_scoped_true___WEBPACK_IMPORTED_MODULE_0__.staticRenderFns, false, null, '7ba5bd90', null,/* hot reload */)从上方的产物可以看出,App.vue 文件被编译分为三块,_App_vue_vue_type_template_id_7ba5bd90_scoped_true___WEBPACK_IMPORTED_MODULE_0__ 、 _App_vue_vue_type_script_lang_js___WEBPACK_IMPORTED_MODULE_1__,_node_modules_vue_loader_lib_runtime_componentNormalizer_js__WEBPACK_IMPORTED_MODULE_2__,这三个模块恰好对应vue模板中的 template、script、style这三个标签的模板内容,所以得出结论:vue-loader 会将 vue 模板中的template、script、style 标签内容分解为三个模块。 为此,我找到 vue-loader 的源码,下面分析其源码逻辑:
vue-loader 源码源码里很清楚的可以看到 vue-loader 使用了 vue/compiler-sfc 中的 parse 方法对 vue 的源文件进行的解析,将模板语法解析为一段可描述的对象
module.exports = function (source) { // 这里就是.vue文件的AST const loaderContext = this ... // 解析.vue原文件,source对应的就是.vue模板 const descriptor = compiler.parse({ source, compiler: options.compiler || templateCompiler, filename, sourceRoot, needMap: sourceMap }) ... // 使用webpack query source let templateImport = `var render, staticRenderFns` let templateRequest if (descriptor.template) { const src = descriptor.template.src || resourcePath const idQuery = `&id=${id}` const scopedQuery = hasScoped ? `&scoped=true` : `` const attrsQuery = attrsToQuery(descriptor.template.attrs) // const tsQuery = // options.enableTsInTemplate !== false && isTS ? `&ts=true` : `` const query = `?vue&type=template${idQuery}${scopedQuery}${attrsQuery}${inheritQuery}` const request = (templateRequest = stringifyRequest(src + query)) templateImport = `import { render, staticRenderFns } from ${request}` } ... code += `\nexport default component.exports` return code}对 descriptor 进行打印,输出结果如下,vue-loader 对源文件编译后,vue 模板会被转化成抽象语法树(AST),此处便是模板编译的入口,使用编译后的 AST 将 vue 模板拆分为 template 、script 和 style 三部分,方便后面 webpack 通过 resourceQuery 匹配分发到各个loader 进行二次解析编译,template 部分会被 template-loader 进行二次编译解析,最终生成render 函数。
{ source: '<template>\n' + ' <div id='box'>\n' + ' {{ count }}\n' + ' </div>\n' + '</template>\n' + '\n' + '<script>\n' + 'export default {\n' + ' props: {},\n' + ' data() {\n' + ' return {\n' + ' count: 0\n' + ' }\n' + ' }\n' + '}\n' + '</script>\n' + '\n' + '<style>\n' + '#box {\n' + ' background: red;\n' + '}\n' + '</style>\n', filename: 'App.vue', template: { type: 'template', content: '\n<div id='box'>\n {{ count }}\n</div>\n', start: 10, end: 53, attrs: {} }, script: { type: 'script', content: '\n' + 'export default {\n' + ' props: {},\n' + ' data() {\n' + ' return {\n' + ' count: 0\n' + ' }\n' + ' }\n' + '}\n', start: 74, end: 156, attrs: {} }, ....}template-loadertemplate-loader 的作用是将 import { render, staticRenderFns } from "./App.vue?vue&type=template&id=7ba5bd90&" 模块编译成 render 函数并导出,以下是编译产物:
// 编译前<div id='box'> {{ count }}</div>// 编译后var render = function render() { var _vm = this, _c = _vm._self._c return _c('div', { attrs: { id: 'box' } }, [ _vm._v('\n ' + _vm._s(_vm.count) + '\n'), ])}var staticRenderFns = []render._withStripped = trueexport { render, staticRenderFns }template-loader 核心原理是通过 vue/compiler-sfc 将模板转换成为 render 函数,并返回 template 编译产物
module.exports = function (source) { const loaderContext = this ... // 接收模板编译核心库 const { compiler, templateCompiler } = resolveCompiler(ctx, loaderContext) ... // 开启编译 const compiled = compiler.compileTemplate(finalOptions) ... // 编译后产出,code就是render函数 const { code } = compiled // 导出template模块 return code + `\nexport { render, staticRenderFns }`}2、模板编译流程vue/compiler-sfc 是模板编译的核心库,在 vue2.7 版本中使用,而 vue2.7 以下的版本都是使用vue-template-compiler,本质两个包的功能是一样的,都可以将模板语法编译为 JavaScript,接下来我们来解析一下在模板编译过程中使用的方法:
parseHTML 阶段可以将 vue 文件中的模板语法转义为 AST,为后续创建 dom 结构做预处理
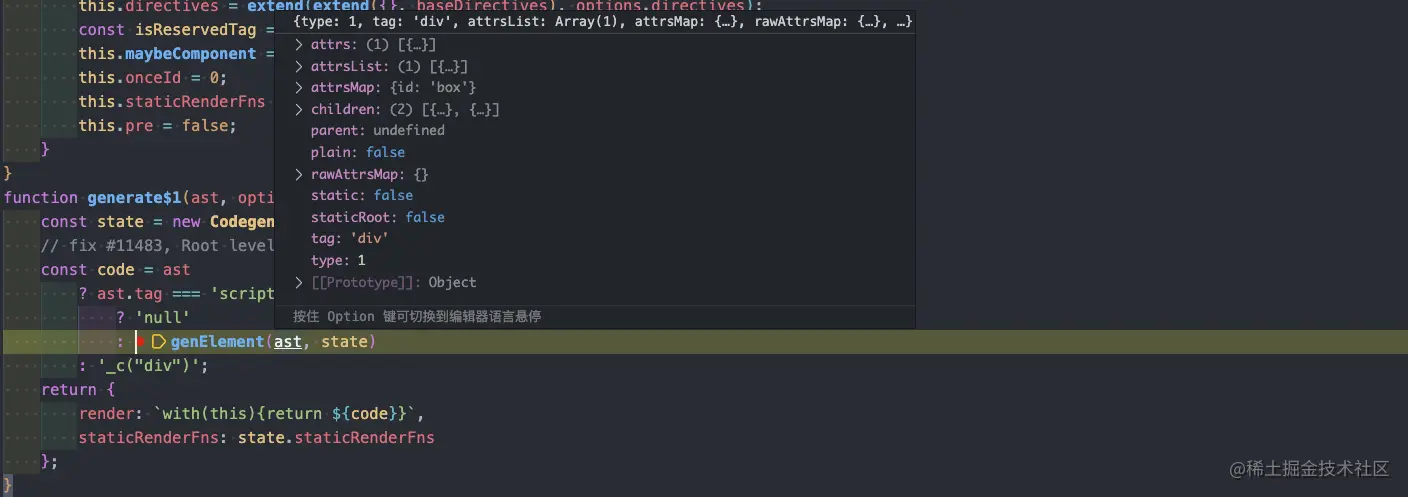
export function parseHTML(html, options: HTMLParserOptions) { // 存储解析后的标签 const stack: any[] = [] const expectHTML = options.expectHTML const isUnaryTag = options.isUnaryTag || no const canBeLeftOpenTag = options.canBeLeftOpenTag || no let index = 0 let last, lastTag // 循环 html 字符串结构 while (html) { // 记录当前最新html last = html if (!lastTag || !isPlainTextElement(lastTag)) { // 获取以 < 为开始的位置 let textEnd = html.indexOf('<') if (textEnd === 0) {// 解析注释if (comment.test(html)) { const commentEnd = html.indexOf('-->') if (commentEnd >= 0) { if (options.shouldKeepComment && options.comment) { options.comment(html.substring(4, commentEnd),index,index + commentEnd + 3 ) } advance(commentEnd + 3) continue }}// 解析条件注释if (conditionalComment.test(html)) { const conditionalEnd = html.indexOf(']>') if (conditionalEnd >= 0) { advance(conditionalEnd + 2) continue }}// 解析 Doctypeconst doctypeMatch = html.match(doctype)if (doctypeMatch) { advance(doctypeMatch[0].length) continue}// 解析截取结束标签const endTagMatch = html.match(endTag)if (endTagMatch) { const curIndex = index advance(endTagMatch[0].length) parseEndTag(endTagMatch[1], curIndex, index) continue}// 解析截取开始标签const startTagMatch = parseStartTag()if (startTagMatch) { handleStartTag(startTagMatch) if (shouldIgnoreFirstNewline(startTagMatch.tagName, html)) { advance(1) } continue} } let text, rest, next if (textEnd >= 0) {rest = html.slice(textEnd)while ( !endTag.test(rest) && !startTagOpen.test(rest) && !comment.test(rest) && !conditionalComment.test(rest)) { // < in plain text, be forgiving and treat it as text next = rest.indexOf('<', 1) if (next < 0) break textEnd += next rest = html.slice(textEnd)}text = html.substring(0, textEnd) } // 纯文本节点 if (textEnd < 0) {text = html } // 截取文本节点 if (text) {advance(text.length) } if (options.chars && text) {options.chars(text, index - text.length, index) } } else { let endTagLength = 0 const stackedTag = lastTag.toLowerCase() const reStackedTag =reCache[stackedTag] ||(reCache[stackedTag] = new RegExp( '([\s\S]*?)(</' + stackedTag + '[^>]*>)', 'i')) const rest = html.replace(reStackedTag, function (all, text, endTag) {endTagLength = endTag.lengthif (!isPlainTextElement(stackedTag) && stackedTag !== 'noscript') { text = text .replace(/<!--([\s\S]*?)-->/g, '$1') // #7298 .replace(/<![CDATA[([\s\S]*?)]]>/g, '$1')}if (shouldIgnoreFirstNewline(stackedTag, text)) { text = text.slice(1)}if (options.chars) { options.chars(text)}return '' }) index += html.length - rest.length html = rest parseEndTag(stackedTag, index - endTagLength, index) } if (html === last) { options.chars && options.chars(html) break } } // 清空闭合标签 parseEndTag() // 截取标签,前后推进位置 function advance(n) { index += n html = html.substring(n) } // 解析开始标签 function parseStartTag() { const start = html.match(startTagOpen) if (start) { const match: any = {tagName: start[1],attrs: [],start: index } advance(start[0].length) let end, attr while (!(end = html.match(startTagClose)) &&(attr = html.match(dynamicArgAttribute) || html.match(attribute)) ) {attr.start = indexadvance(attr[0].length)attr.end = indexmatch.attrs.push(attr) } if (end) {match.unarySlash = end[1]advance(end[0].length)match.end = indexreturn match } } } // 匹配处理开始标签 function handleStartTag(match) { const tagName = match.tagName const unarySlash = match.unarySlash if (expectHTML) { if (lastTag === 'p' && isNonPhrasingTag(tagName)) {parseEndTag(lastTag) } if (canBeLeftOpenTag(tagName) && lastTag === tagName) {parseEndTag(tagName) } } const unary = isUnaryTag(tagName) || !!unarySlash const l = match.attrs.length const attrs: ASTAttr[] = new Array(l) for (let i = 0; i < l; i++) { const args = match.attrs[i] const value = args[3] || args[4] || args[5] || '' const shouldDecodeNewlines =tagName === 'a' && args[1] === 'href' ? options.shouldDecodeNewlinesForHref : options.shouldDecodeNewlines attrs[i] = {name: args[1],value: decodeAttr(value, shouldDecodeNewlines) } if (__DEV__ && options.outputSourceRange) {attrs[i].start = args.start + args[0].match(/^\s*/).lengthattrs[i].end = args.end } } if (!unary) { stack.push({tag: tagName,lowerCasedTag: tagName.toLowerCase(),attrs: attrs,start: match.start,end: match.end }) lastTag = tagName } if (options.start) { options.start(tagName, attrs, unary, match.start, match.end) } } // 解析结束标签 function parseEndTag(tagName?: any, start?: any, end?: any) { let pos, lowerCasedTagName if (start == null) start = index if (end == null) end = index // Find the closest opened tag of the same type if (tagName) { lowerCasedTagName = tagName.toLowerCase() for (pos = stack.length - 1; pos >= 0; pos--) {if (stack[pos].lowerCasedTag === lowerCasedTagName) { break} } } else { // If no tag name is provided, clean shop pos = 0 } if (pos >= 0) { // Close all the open elements, up the stack for (let i = stack.length - 1; i >= pos; i--) {if (__DEV__ && (i > pos || !tagName) && options.warn) { options.warn(`tag <${stack[i].tag}> has no matching end tag.`, { start: stack[i].start, end: stack[i].end })}if (options.end) { options.end(stack[i].tag, start, end)} } // Remove the open elements from the stack stack.length = pos lastTag = pos && stack[pos - 1].tag } else if (lowerCasedTagName === 'br') { if (options.start) {options.start(tagName, [], true, start, end) } } else if (lowerCasedTagName === 'p') { if (options.start) {options.start(tagName, [], false, start, end) } if (options.end) {options.end(tagName, start, end) } } }}genElement 阶段genElement 会将 AST 预发转义为字符串代码,后续可将其包装成 render 函数的返回值
// 将AST预发转义成render函数字符串export function genElement(el: ASTElement, state: CodegenState): string { if (el.parent) { el.pre = el.pre || el.parent.pre } if (el.staticRoot && !el.staticProcessed) { // 输出静态树 return genStatic(el, state) } else if (el.once && !el.onceProcessed) { // 处理v-once指令 return genOnce(el, state) } else if (el.for && !el.forProcessed) { // 处理循环结构 return genFor(el, state) } else if (el.if && !el.ifProcessed) { // 处理条件语法 return genIf(el, state) } else if (el.tag === 'template' && !el.slotTarget && !state.pre) { // 处理子标签 return genChildren(el, state) || 'void 0' } else if (el.tag === 'slot') { // 处理插槽 return genSlot(el, state) } else { // 处理组件和dom元素 ... return code }}通过genElement函数包装处理后,将vue 模板的 template 标签部分转换为 render 函数,如下所示:
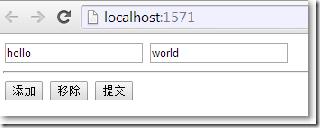
const compiled = compiler.compileTemplate({ source: '\n' + '<div id='box'>\n' + ' {{ count }}\n' + ' <button @add='handleAdd'>+</button>\n' + '</div>\n'});const { code } = compiled;// 编译后var render = function render() { var _vm = this, _c = _vm._self._c return _c('div', { attrs: { id: 'box' } }, [ _vm._v('\n ' + _vm._s(_vm.count) + '\n '), _c('button', { on: { add: _vm.handleAdd } }, [_vm._v('+')]), ])}var staticRenderFns = []render._withStripped = truecompilerToFunction 阶段将 genElement 阶段编译的字符串产物,通过 new Function将 code 转为函数
export function createCompileToFunctionFn(compile: Function): Function { const cache = Object.create(null) return function compileToFunctions( template: string, options?: CompilerOptions, vm?: Component ): CompiledFunctionResult { ... // 编译 const compiled = compile(template, options) // 将genElement阶段的产物转化为function function createFunction(code, errors) { try {return new Function(code) } catch (err: any) {errors.push({ err, code })return noop } } const res: any = {} const fnGenErrors: any[] = [] // 将code转化为function res.render = createFunction(compiled.render, fnGenErrors) res.staticRenderFns = compiled.staticRenderFns.map(code => { return createFunction(code, fnGenErrors) }) ... }}为了方便理解,使用断点调试,来看一下 compileTemplate 都经历了哪些操作:

首先会判断是否需要预处理,如果需要预处理,则会对 template 模板进行预处理并返回处理结果,此处跳过预处理,直接进入 actuallCompile 函数

这里可以看到本身内部还有一层编译函数对 template 进行编译,这才是最核心的编译方法,而这个 compile 方法来源于 createCompilerCreator

createCompilerCreator 返回了两层函数,最终返回值则是 compile 和 compileToFunction,这两个是将 template 转为 render 函数的关键,可以看到 template 会被解析成 AST 树,最后通过 generate 方法转义成函数 code,接下来我们看一下parse函数中是如何将 template 转为 AST 的。

继续向下 debug 后,会走到 parseHTML 函数,这个函数是模板编译中用来解析 HTML 结构的核心方法,通过回调 + 递归最终遍历整个 HTML 结构并将其转化为 AST 树。
parseHTML 阶段使用 parseHTML 解析成的 AST 创建 render 函数和 Vdom

将 AST 结构解析成为虚拟 dom 树
最终编译输出为 render 函数,得到最终打包构建的产物。

到此我们应该了解了 vue 是如何打包构建将模板编译为渲染函数的,有了渲染函数后,只需要将渲染函数的 this 指向组件实例,即可和组件的响应式数据绑定。vue 的每一个组件都会对应一个渲染 Watcher ,他的本质作用是把响应式数据作为依赖收集,当响应式数据发生变化时,会触发 setter 执行响应式依赖通知渲染 Watcher 重新执行 render 函数做到页面数据的更新。
以上就是Vue2模版编译流程详解的详细内容,更多关于Vue2模版编译的资料请关注好吧啦网其它相关文章!
 网公网安备
网公网安备