SpringBoot中使用 RabbitMQ的教程详解
本章主要建立在已经安装好Erlang以及RabbitMQ的基础上,接下来,简单介绍一下使用
一、Direct直接模式
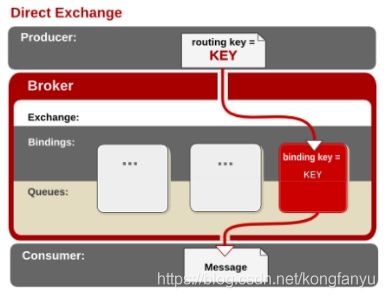
通过routingKey和exchange决定的那个唯一的queue可以接收消息
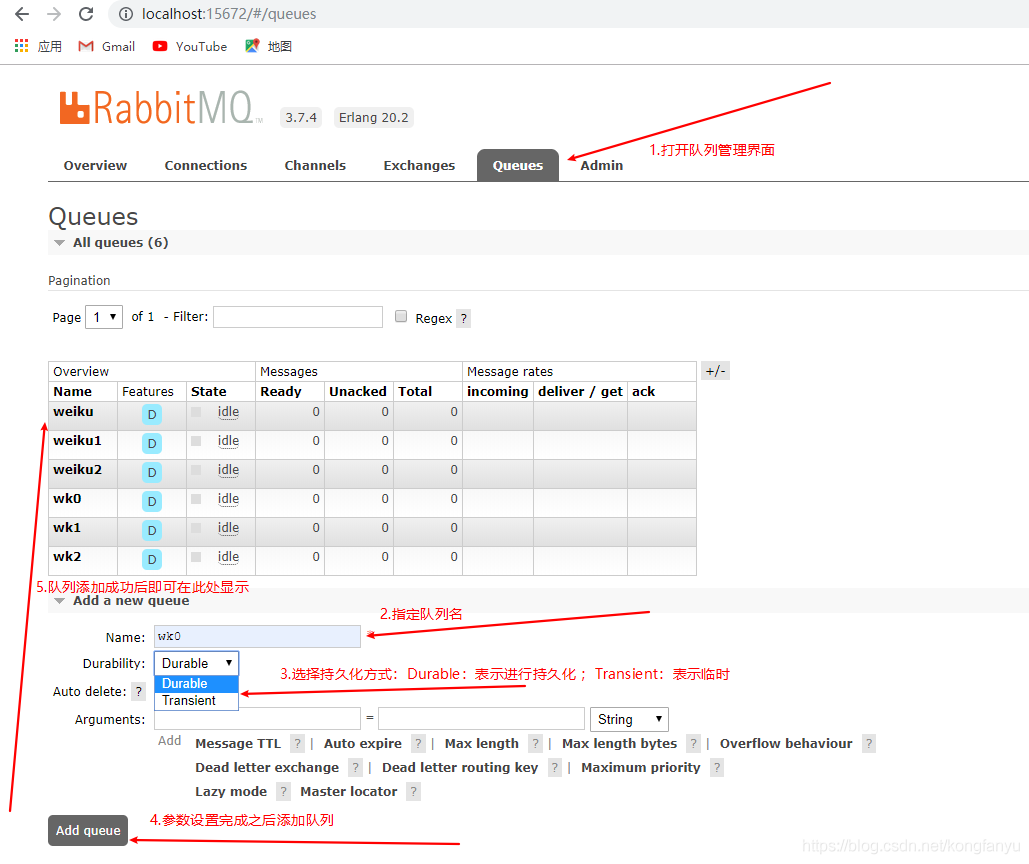
1、首先到RabbitMQ的管理界面新建一个队列(Direct模式)
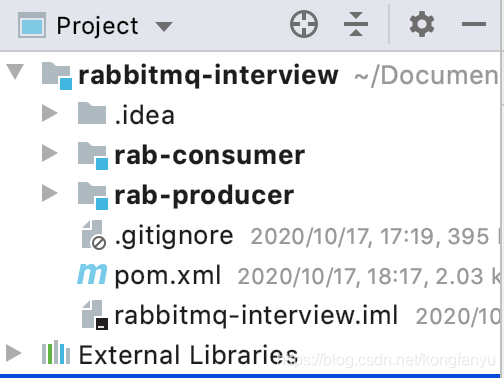
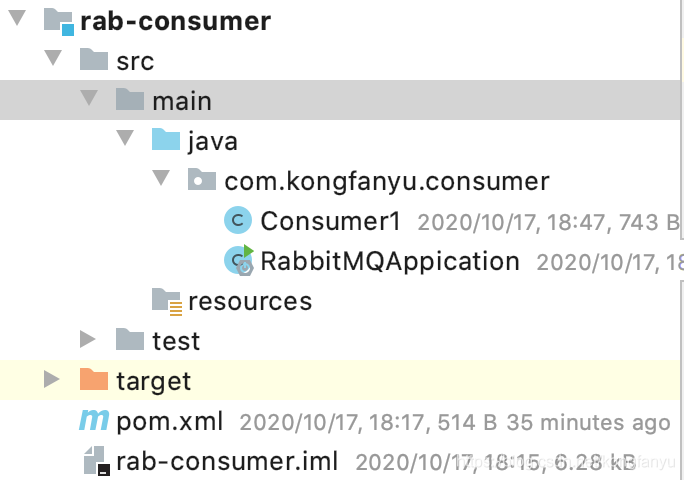
2、测试项目的基础结构如下:
这里为了方便测试,直接在父项目中建立两个子模块(生产者和消费者)
3、pom.xml文件的依赖如下:
父项目:
<?xml version='1.0' encoding='UTF-8'?><project xmlns='http://maven.apache.org/POM/4.0.0' xmlns:xsi='http://www.w3.org/2001/XMLSchema-instance' xsi:schemaLocation='http://maven.apache.org/POM/4.0.0 https://maven.apache.org/xsd/maven-4.0.0.xsd'> <modelVersion>4.0.0</modelVersion> <packaging>pom</packaging> <modules> <module>rab-consumer</module> <module>rab-producer</module> </modules> <parent> <groupId>org.springframework.boot</groupId> <artifactId>spring-boot-starter-parent</artifactId> <version>2.0.7.RELEASE</version> <relativePath/> <!-- lookup parent from repository --> </parent> <groupId>interview</groupId> <artifactId>rabbitmq-interview</artifactId> <version>0.0.1-SNAPSHOT</version> <name>rabbitmq-interview</name> <description>Demo rabbitmq project for Spring Boot</description> <properties> <java.version>1.8</java.version> </properties> <dependencies> <!--1、amqp高级消息队列的依赖--> <dependency> <groupId>org.springframework.boot</groupId> <artifactId>spring-boot-starter-amqp</artifactId> </dependency><!--2、测试的依赖--> <dependency> <groupId>org.springframework.boot</groupId> <artifactId>spring-boot-starter-test</artifactId> </dependency> <dependency> <groupId>org.springframework.amqp</groupId> <artifactId>spring-rabbit-test</artifactId> <scope>test</scope> </dependency> </dependencies> <build> <plugins> <plugin> <groupId>org.springframework.boot</groupId> <artifactId>spring-boot-maven-plugin</artifactId> </plugin> </plugins> </build></project>
4、准备发送的数据
回到IDEA中,打开子模块的生产者模块,我这边是rab_producer,在resource下建立springboot的配置文件:application.yml文件,内容如下:
spring: rabbitmq: host: localhost# host 为RabbitMQ主机的地址
之后新建一个SpringBoot的启动类:
@SpringBootApplicationpublic class RabbitMQApplication { public static void main(String[] args) { SpringApplication.run(RabbitMQApplication.class); }}
然后新建测试类:
@RunWith(SpringRunner.class) // 固定写法@SpringBootTest(classes = RabbitMQApplication.class) // SpringBoot启动类(自定义的)public class RabTest { @Autowired private RabbitTemplate rabbitTemplate; // 注入一个RabbitMQ的模板对象,操作消息队列的对象 // 发送一条点对点(Direct)的消息,又称为直连 @Test public void sendQueue(){ System.out.println('开始向队列中发送一条消息!'); // 参数1:管理中的队列名 参数2:发送的消息 rabbitTemplate.convertAndSend('weiku','message:这是一条消息!'); System.out.println('消息发送完毕!'); }}
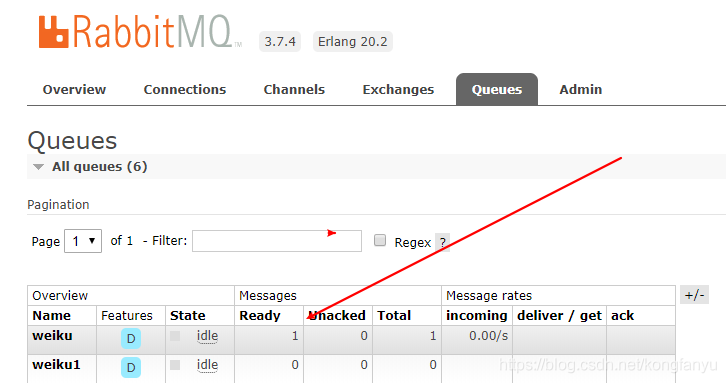
运行测试方法即可把消息发送到队列(weiku)中。
如果消息未被消费,可在管理界面查看到:
3、准备消费者接收消息
回到IDEA中,打开子模块的消费者模块,我这边是rab_consumer,在子模块中创建一个启动类,内容如下:
@SpringBootApplicationpublic class RabbitMQApplication { public static void main(String[] args) { SpringApplication.run(RabbitMQApplication.class); }}
完成之后,定义一个接收消息的监听器,并且注入到Spring容器中,代码如下:
@Component // 需要注入到Spring容器中@RabbitListener(queues = 'weiku') // 指定监听的队列名public class Consumer1 { @RabbitHandler // 消息接收处理 public void showMSG(String message){ // 得到我们producer中发送的Object数据,此处可根据传过来的类型来选择接收,否则抛出异常 System.out.println('weiku收到的消息内容为:' + message); }}
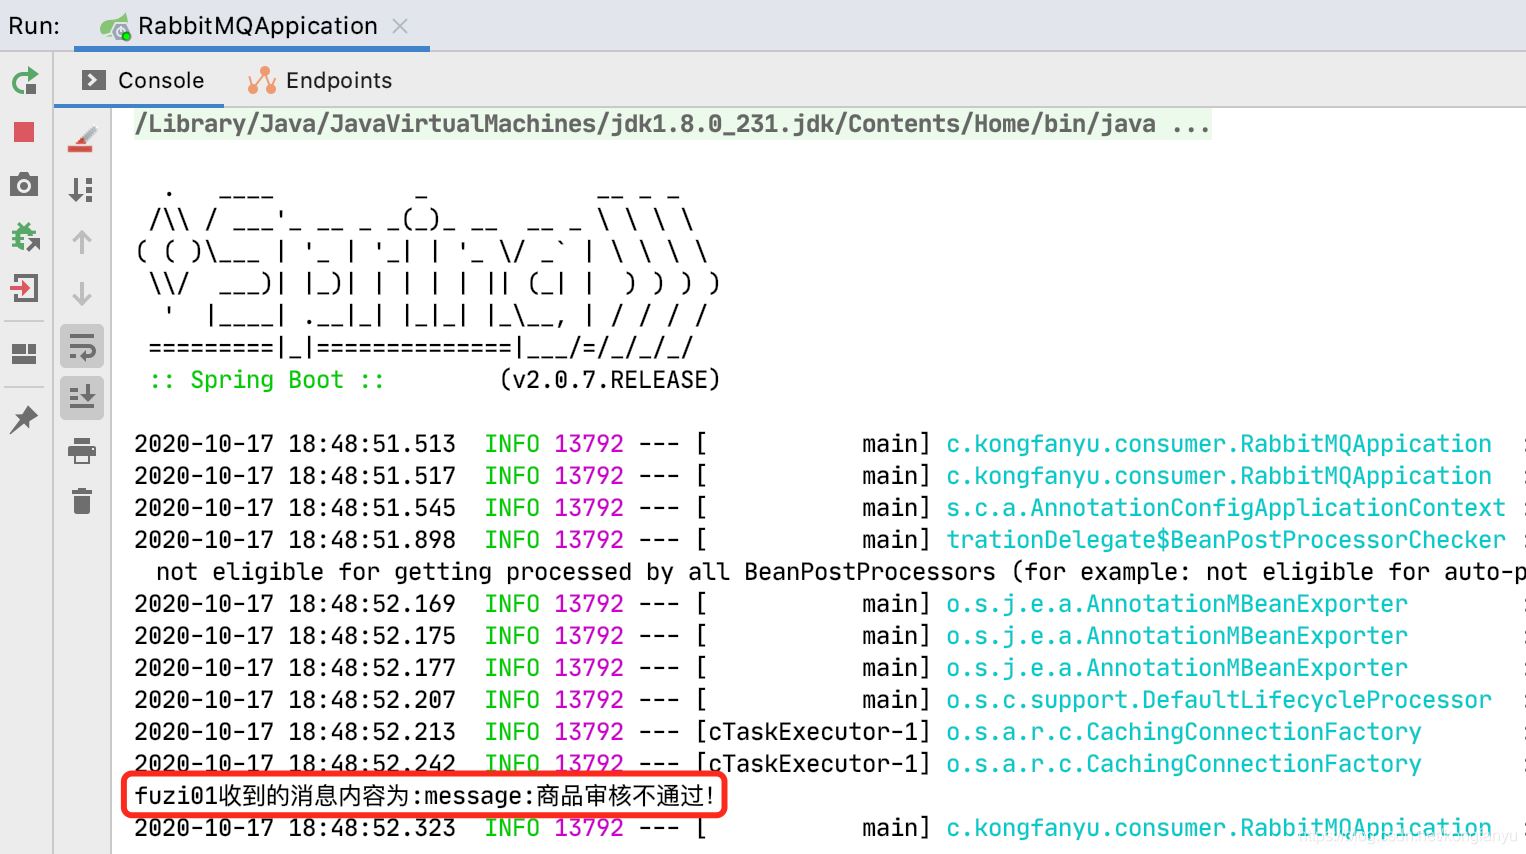
准备完成之后,运行启动类可接收到我们刚刚发送的Direct点对点的消息,这种模式的消息只能被一个消费者所消费到,运行结果如下:
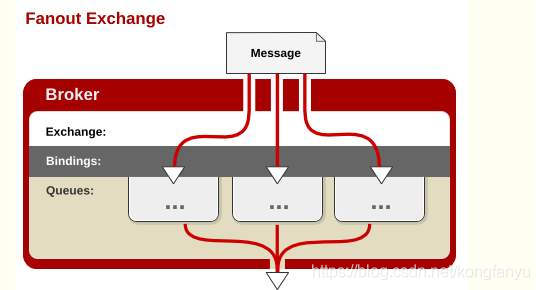
二、fanout广播模式
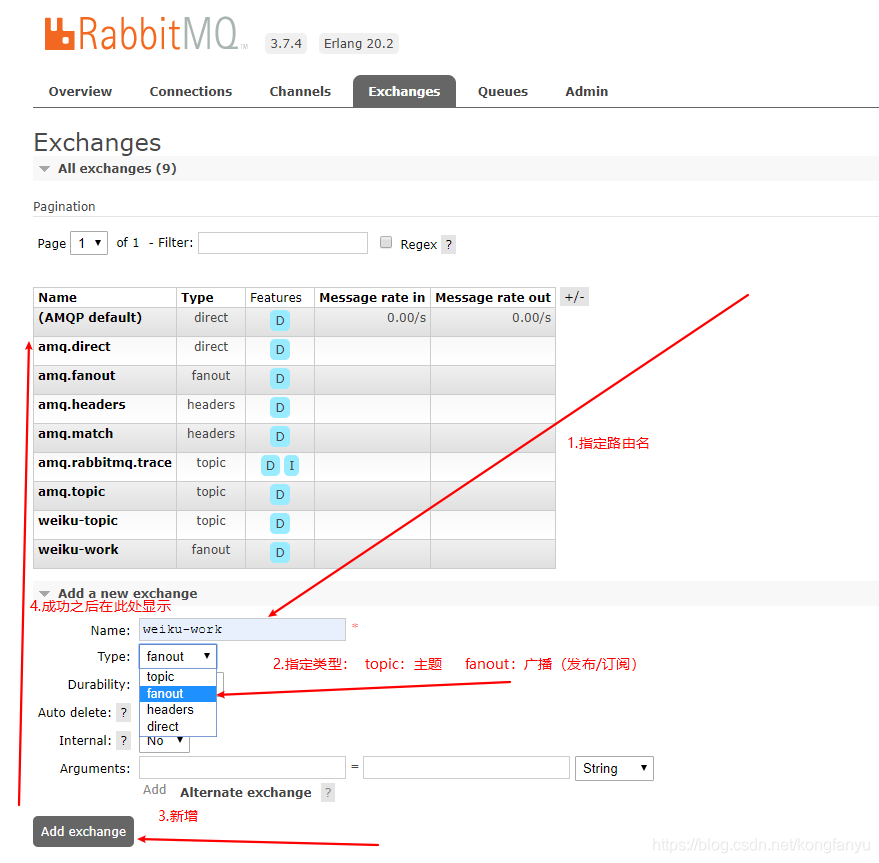
首先需要到RabbitMQ的管理界面新增一个路由交换机(Exchange)
新建完路由之后,需要再新建几个队列,如图:
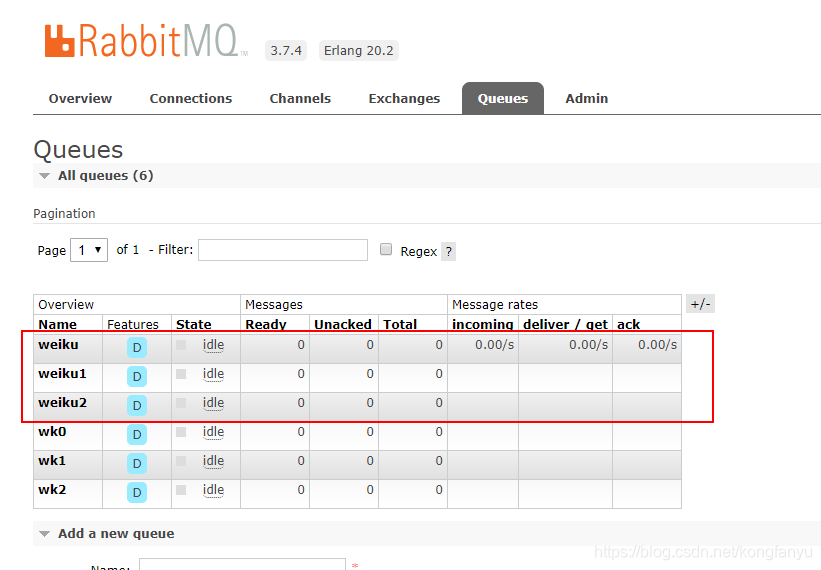
之后,还没完,需要把我们新建路由和我们新建的队列绑定:
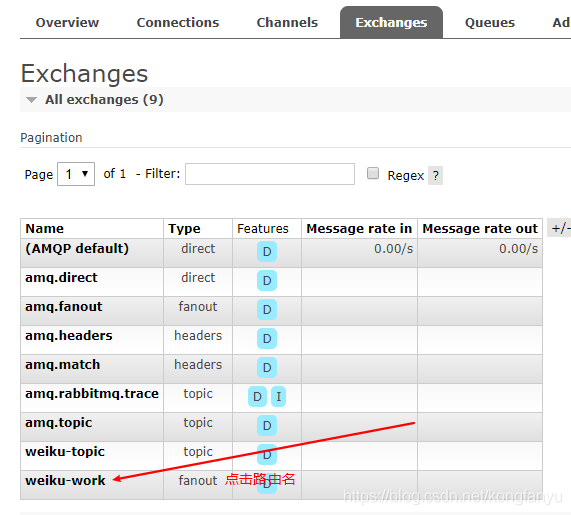
出现如图界面:
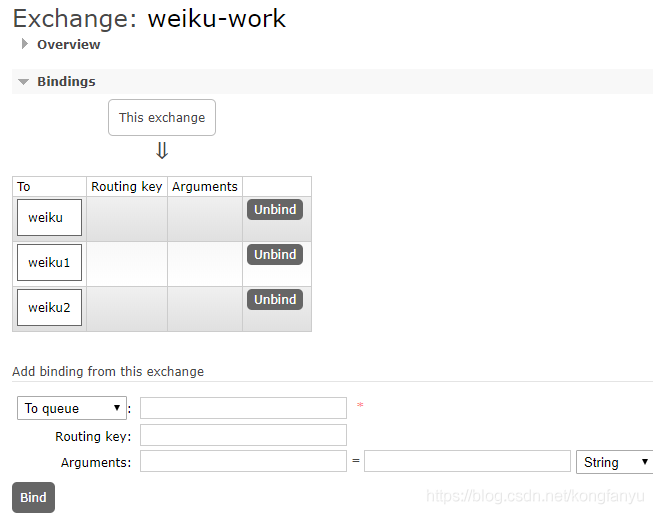
绑定完成之后,开始代码测试。
5、进行 发布/订阅 的代码测试
生产者:
// 广播的形式发送,同一个路由下的所有队列都能接收到消息@Testpublic void sendFanout(){ System.out.println('开始向路由发送消息(路由下的所有Queue都能收到该消息)'); // 参数1:路由名 参数2:可有可无 参数3:发送的消息内容 rabbitTemplate.convertAndSend('weiku-work','','这是一条所有消费者都能收到的消息!'); System.out.println('消息发送成功!');}
消费者:
消费者1:
@Component // 需要注入到Spring容器中@RabbitListener(queues = 'weiku') // 指定监听的队列名public class Consumer1 { @RabbitHandler // 消息接收处理 public void showMSG(String message){ // 得到我们producer中发送的Object数据,此处可根据传过来的类型来选择接收,否则抛出异常 System.out.println('weiku收到的消息内容为:' + message); }}
消费者2:
@Component // 需要注入到Spring容器中@RabbitListener(queues = 'weiku1') // 指定监听的队列名public class Consumer2 { @RabbitHandler // 消息接收处理 public void getMSG(String msg){ System.out.println('weiku1收到的消息如下:' + msg); }}
消费者3:
@Component // 需要注入到Spring容器中@RabbitListener(queues = 'weiku2') // 指定监听的队列名public class Consumer3 { @RabbitHandler // 消息接收处理 public void getMSG(String msg){ System.out.println('weiku2收到的消息如下:' + msg); }}
先运行生产者的测试发送消息的方法,再运行消费者的SpringBoot启动类。
运行结果如下:

三、Topic通配符模式
topic主题模式模糊匹配,不是精确匹配。

新建一个用来发送主题的路由
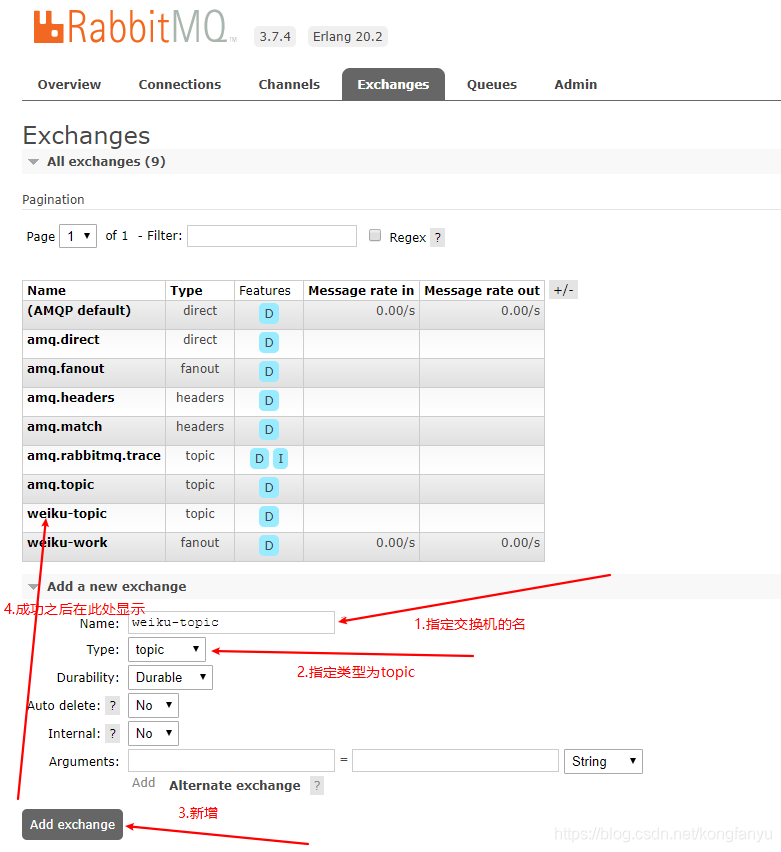
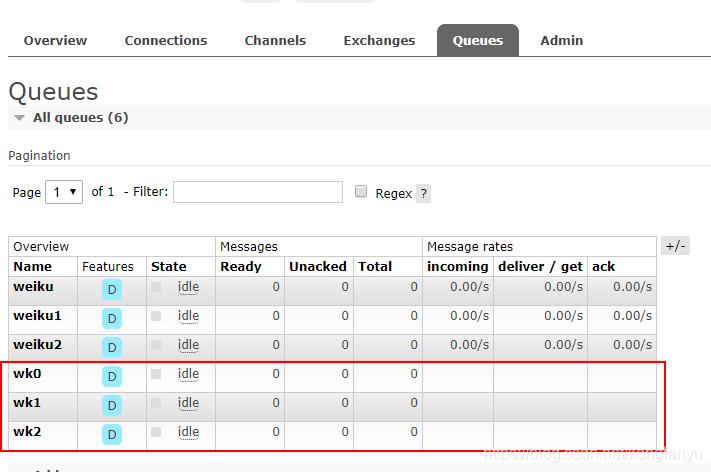
路由新建完之后,新建3个队列,用来接收发布的 topic,如图:
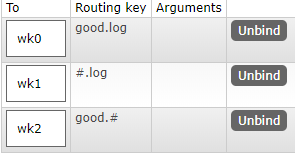
之后还需把我们新建的队列和路由进行绑定,如图所示:
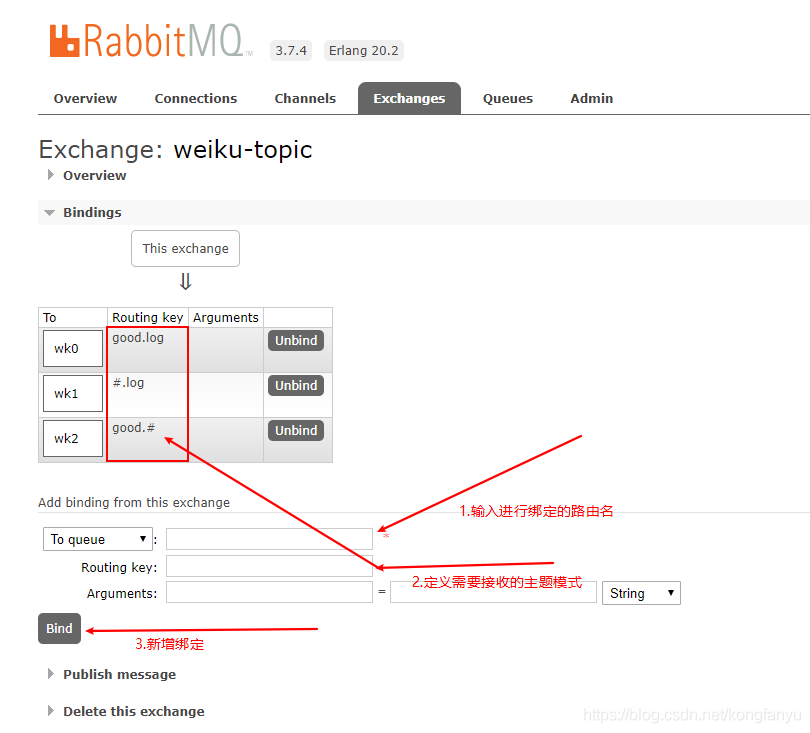
这里的 # 代表所有类型匹配。
以上的准备完成之后,开始代码测试:
测试1:
生产者:
@Testpublic void sendTopic1(){ System.out.println('开始向路由中发送消息!参数2:routingKey'); // 参数1:路由器名 参数2:类似于发送的规则名 rabbitTemplate.convertAndSend('weiku-topic','good.log','这是一条good.log消息');}
此处三个队列都能接收到数据,因为都匹配。
消费者:
消费者1:
@Component@RabbitListener(queues = 'wk0')public class Con1 { @RabbitHandler public void getMSG(String msg){ System.out.println('wk0收到的消息为:' + msg); }}
消费者2:
@Component@RabbitListener(queues = 'wk1')public class Con2 { @RabbitHandler public void getMSG(String msg){ System.out.println('wk1收到的消息如下:' + msg); }}
消费者3:
@Component@RabbitListener(queues = 'wk2')public class Con3 { @RabbitHandler public void getMSG(String msg){ System.out.println('wk2收到的消息如下:' + msg); } /** * 可以进行重载,会找到指定参数的queue上 * @param map */ @RabbitHandler public void getMSG(Map map){ System.out.println('wk2收到的(map)消息如下:' + map); } @RabbitHandler public void getMSG(List list){ System.out.println('wk2收到的(list)消息如下:' + list); }}
启动SpringBoot,运行结果如下:
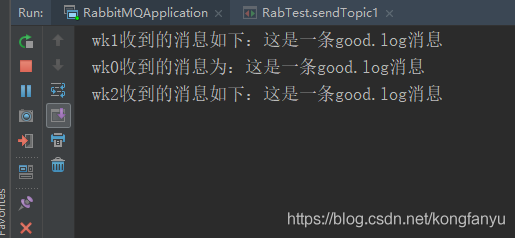
因为这边3个队列都符合了规则,所以都能消费到消息
测试2:
生产者:
@Testpublic void sendTopic2(){ System.out.println('开始向路由中发送消息!参数2:routingKey'); rabbitTemplate.convertAndSend('weiku-topic','维护.log','这是一条 维护.log消息'); rabbitTemplate.convertAndSend('weiku-topic','日志.log','这是一条 日志.log消息');}
消费者运行结果:
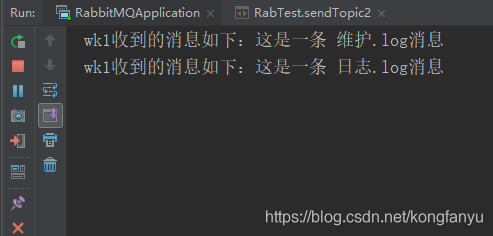
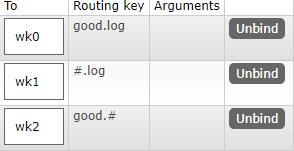
此处只有 wk1 能接收到消息,因为 wk1 符合以 . log 结尾
测试3:
生产者:
@Testpublic void sendTopic3(){ // 1.准备发送的数据 Map map = new HashMap(); map.put(1,'a'); map.put(2,'b'); List list = new ArrayList(); list.add('qq'); list.add('ww'); list.add('SS'); System.out.println('开始向路由中发送消息!参数2为routingKey'); // 2.开始发送消息(发送了2条) // 2.1 发送的数据为map类型 rabbitTemplate.convertAndSend('weiku-topic','good.txt',map); // 2.2 发送的数据为list类型 rabbitTemplate.convertAndSend('weiku-topic','good.txt',list);}
消费者运行效果如下:
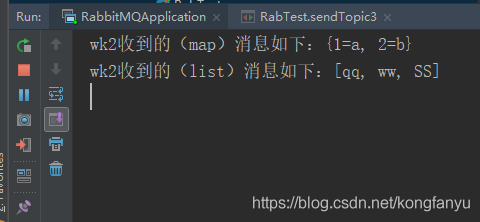
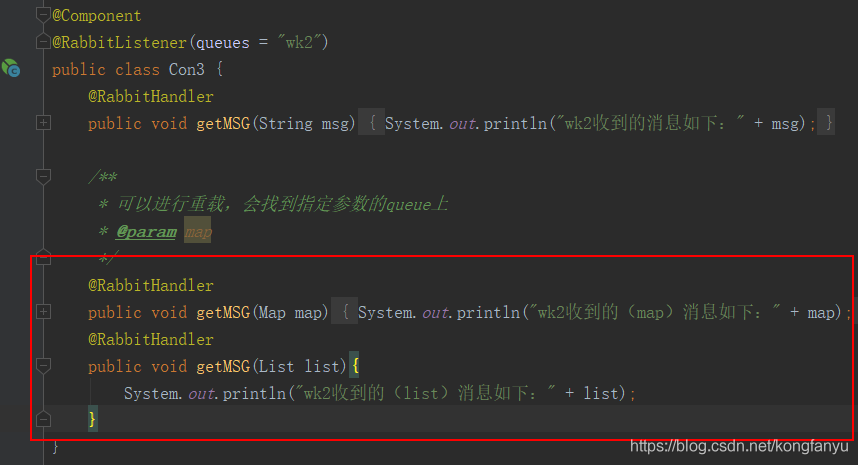
此处只有 wk2 能够收到消息,且被指定类型的监听器所消费。
至此,我们的测试就结束了。
到此这篇关于SpringBoot中使用 RabbitMQ的教程详解的文章就介绍到这了,更多相关SpringBoot使用 RabbitMQ内容请搜索好吧啦网以前的文章或继续浏览下面的相关文章希望大家以后多多支持好吧啦网!
相关文章:
 网公网安备
网公网安备