Springboot apollo原理及使用方法详解
文章背景
如果在spring boot中接入apollo官方文档:https://github.com/ctripcorp/apollo/wiki使用官方的apollo
演示环境(Demo):
106.54.227.205账号/密码:apollo/admin
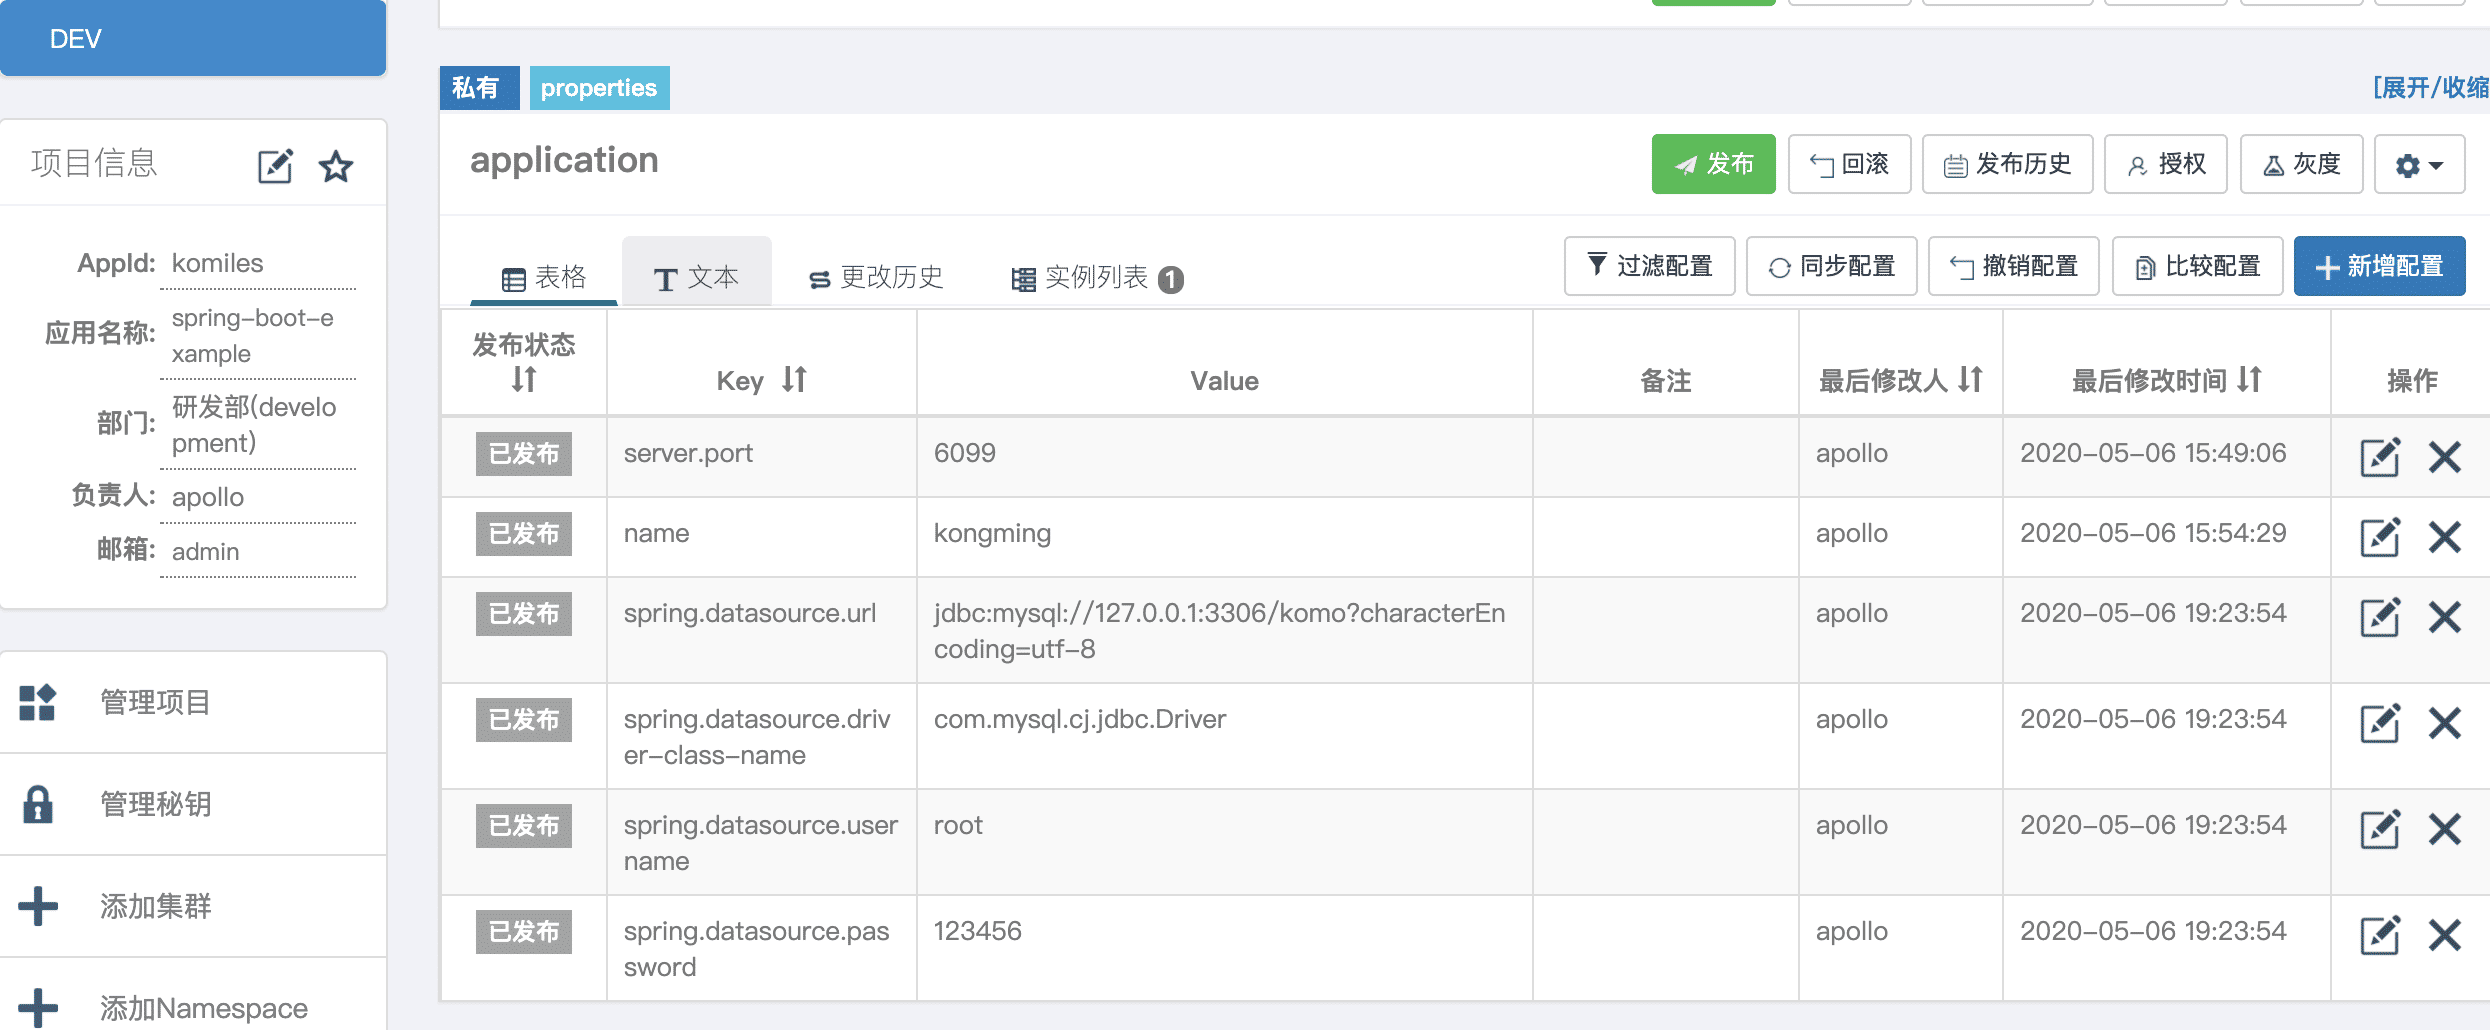
添加配置
spring-boot中如何使用
pom.xml中添加配置
<dependency> <groupId>com.ctrip.framework.apollo</groupId> <artifactId>apollo-client</artifactId> <version>1.1.0</version></dependency>
配置文件中添加apollo地址
app: id: komilesapollo: meta: http://106.54.227.205:8080 bootstrap: enabled: true namespaces: application
启动类中添加代码
添加@EnableApolloConfig注解
package com.example.apollodemo; import com.ctrip.framework.apollo.spring.annotation.EnableApolloConfig;import org.mybatis.spring.annotation.MapperScan;import org.springframework.boot.SpringApplication;import org.springframework.boot.autoconfigure.SpringBootApplication; @SpringBootApplication@EnableApolloConfig@MapperScan('com.example.apollodemo.mapper')public class ApolloDemoApplication { public static void main(String[] args) { SpringApplication.run(ApolloDemoApplication.class, args); System.out.println('============ apollo demo application end ============='); }}
controller类新增文件
ApolloController.java
package com.example.apollodemo.controller; import org.springframework.beans.factory.annotation.Value;import org.springframework.web.bind.annotation.GetMapping;import org.springframework.web.bind.annotation.RequestMapping;import org.springframework.web.bind.annotation.RestController; /** * @author komiles@163.com * @date 2020-05-06 17:28 */@RestController@RequestMapping('/apollo')public class ApolloController { @Value('${name}') private String name; @GetMapping('/name') public String name() { return name; }}
可以读取到配置为kongming.
数据库配置如何使用?
同理,generatorConfig.xml中也可以读取数据库配置
<?xml version='1.0' encoding='UTF-8'?><!DOCTYPE generatorConfiguration PUBLIC '-//mybatis.org//DTD MyBatis Generator Configuration 1.0//EN' 'http://mybatis.org/dtd/mybatis-generator-config_1_0.dtd'><generatorConfiguration> <context targetRuntime='MyBatis3'> <commentGenerator> <property name='suppressDate' value='false'/> <property name='suppressAllComments' value='true'/> </commentGenerator> <!--目标数据库配置--> <jdbcConnection driverClass='com.mysql.jdbc.Driver'connectionURL='${spring.datasource.url}'userId='${spring.datasource.username}'password='${spring.datasource.password}' /> <!-- 指定生成的类型为java类型,避免数据库中number等类型字段 --> <javaTypeResolver> <property name='forceBigDecimals' value='false'/> </javaTypeResolver> <!-- 生成model模型,对应的包,存放位置可以指定具体的路径,如/ProjectName/src,也可以使用MAVEN来自动生成 --> <javaModelGenerator targetPackage='com.example.apollodemo.dao' targetProject='src/main/java'> <property name='enableSubPackages' value='false'/> <property name='trimStrings' value='true'/> <property name='immutable' value='false'/> </javaModelGenerator> <!--对应的xml mapper文件 --> <sqlMapGenerator targetPackage='mapper' targetProject='src/main/resources/mybatis'> <property name='enableSubPackages' value='false'/> </sqlMapGenerator> <!-- 对应的dao接口 --> <javaClientGenerator type='XMLMAPPER' targetPackage='com.example.apollodemo.mapper' targetProject='src/main/java'> <property name='enableSubPackages' value='false'/> </javaClientGenerator> <!--定义需要操作的表及对应的DTO名称--> <table tableName='t_user' domainObjectName='User'/> </context></generatorConfiguration>
项目demo地址https://github.com/KoMiles/spring-example/tree/master/apollo-demo
以上就是本文的全部内容,希望对大家的学习有所帮助,也希望大家多多支持好吧啦网。
相关文章:

 网公网安备
网公网安备