通过实例解析Spring Ioc项目实现过程
0. Ioc
https://docs.spring.io/spring-framework/docs/current/spring-framework-reference/core.html
主要是实现一个控制反转,耦合性大大降低。
1. 建maven项目
建立一个空的maven项目,然后pom.xml添加spring-context的依赖:
<!-- https://mvnrepository.com/artifact/org.springframework/spring-context --> <dependency> <groupId>org.springframework</groupId> <artifactId>spring-context</artifactId> <version>5.2.7.RELEASE</version> </dependency>
2. 创建pojo java对象
package com.aca;public class Hello { private String str; public void setStr(String str) { this.str = str; } public String getStr() { return str; } public Hello(String str){ this.str = str; } @Override public String toString() { return 'Hello{' +'str=’' + str + ’’’ +’}’; }}
3. 创建bean xml配置元数据
配置文件放在resources下。这里以xml为例
<?xml version='1.0' encoding='UTF-8'?><beans xmlns='http://www.springframework.org/schema/beans' xmlns:xsi='http://www.w3.org/2001/XMLSchema-instance' xsi:schemaLocation='http://www.springframework.org/schema/beans https://www.springframework.org/schema/beans/spring-beans.xsd'> <bean class='com.aca.Hello'> <constructor-arg type='java.lang.String' value='fffff'/> </bean></beans>
如果有多个resource或者目录不一致,就需要import一下:
<beans> <import resource='services.xml'/> <import resource='resources/messageSource.xml'/> <import resource='/resources/themeSource.xml'/> <bean /> <bean /></beans>
里面可以调用构造函数来初始化一下bean。
4.创建spring 上下文
这里用ClassPathXmlApplicationContext 方法。
ApplicationContext context = new ClassPathXmlApplicationContext('hbean.xml');// retrieve configured instance Hello hello = context.getBean('Hello', Hello.class);// hello.setStr('abc'); System.out.println(hello);
直接可以用这个bean,由xml注入。
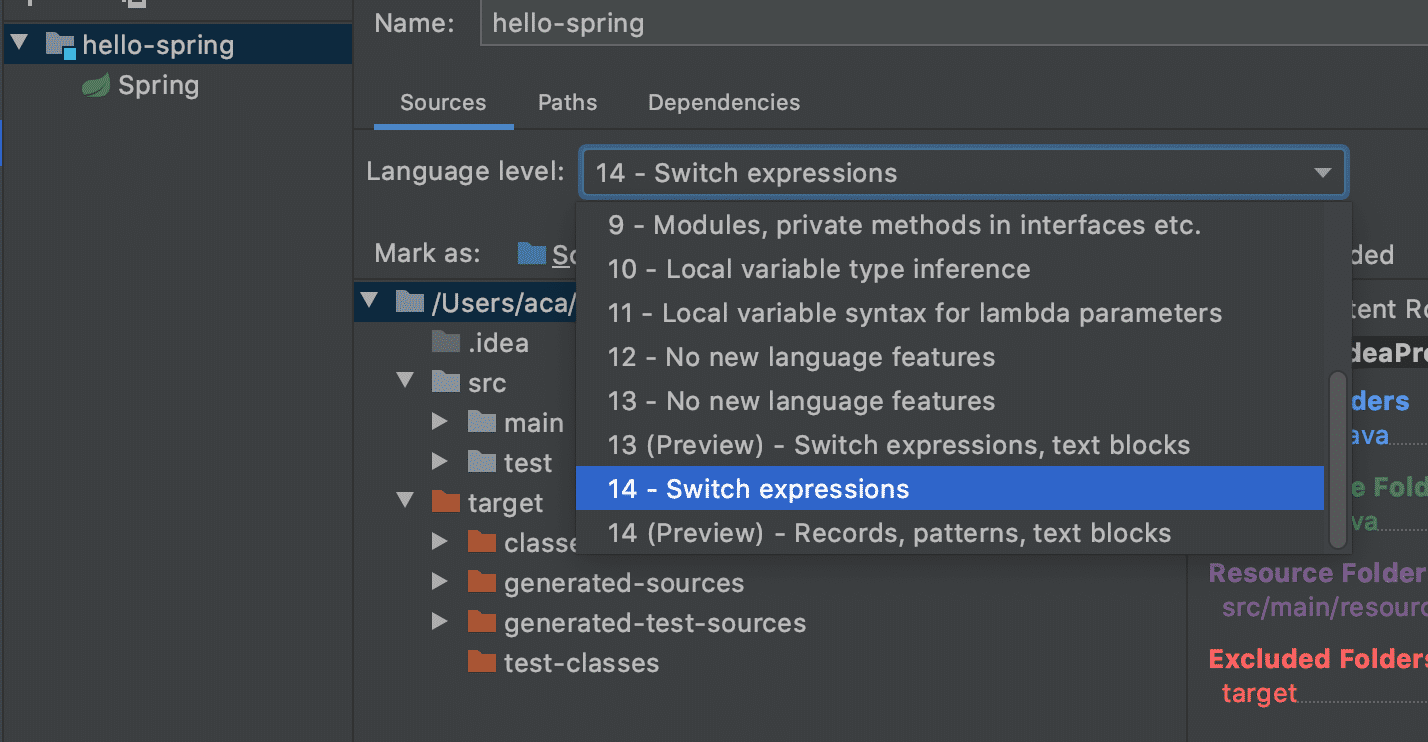
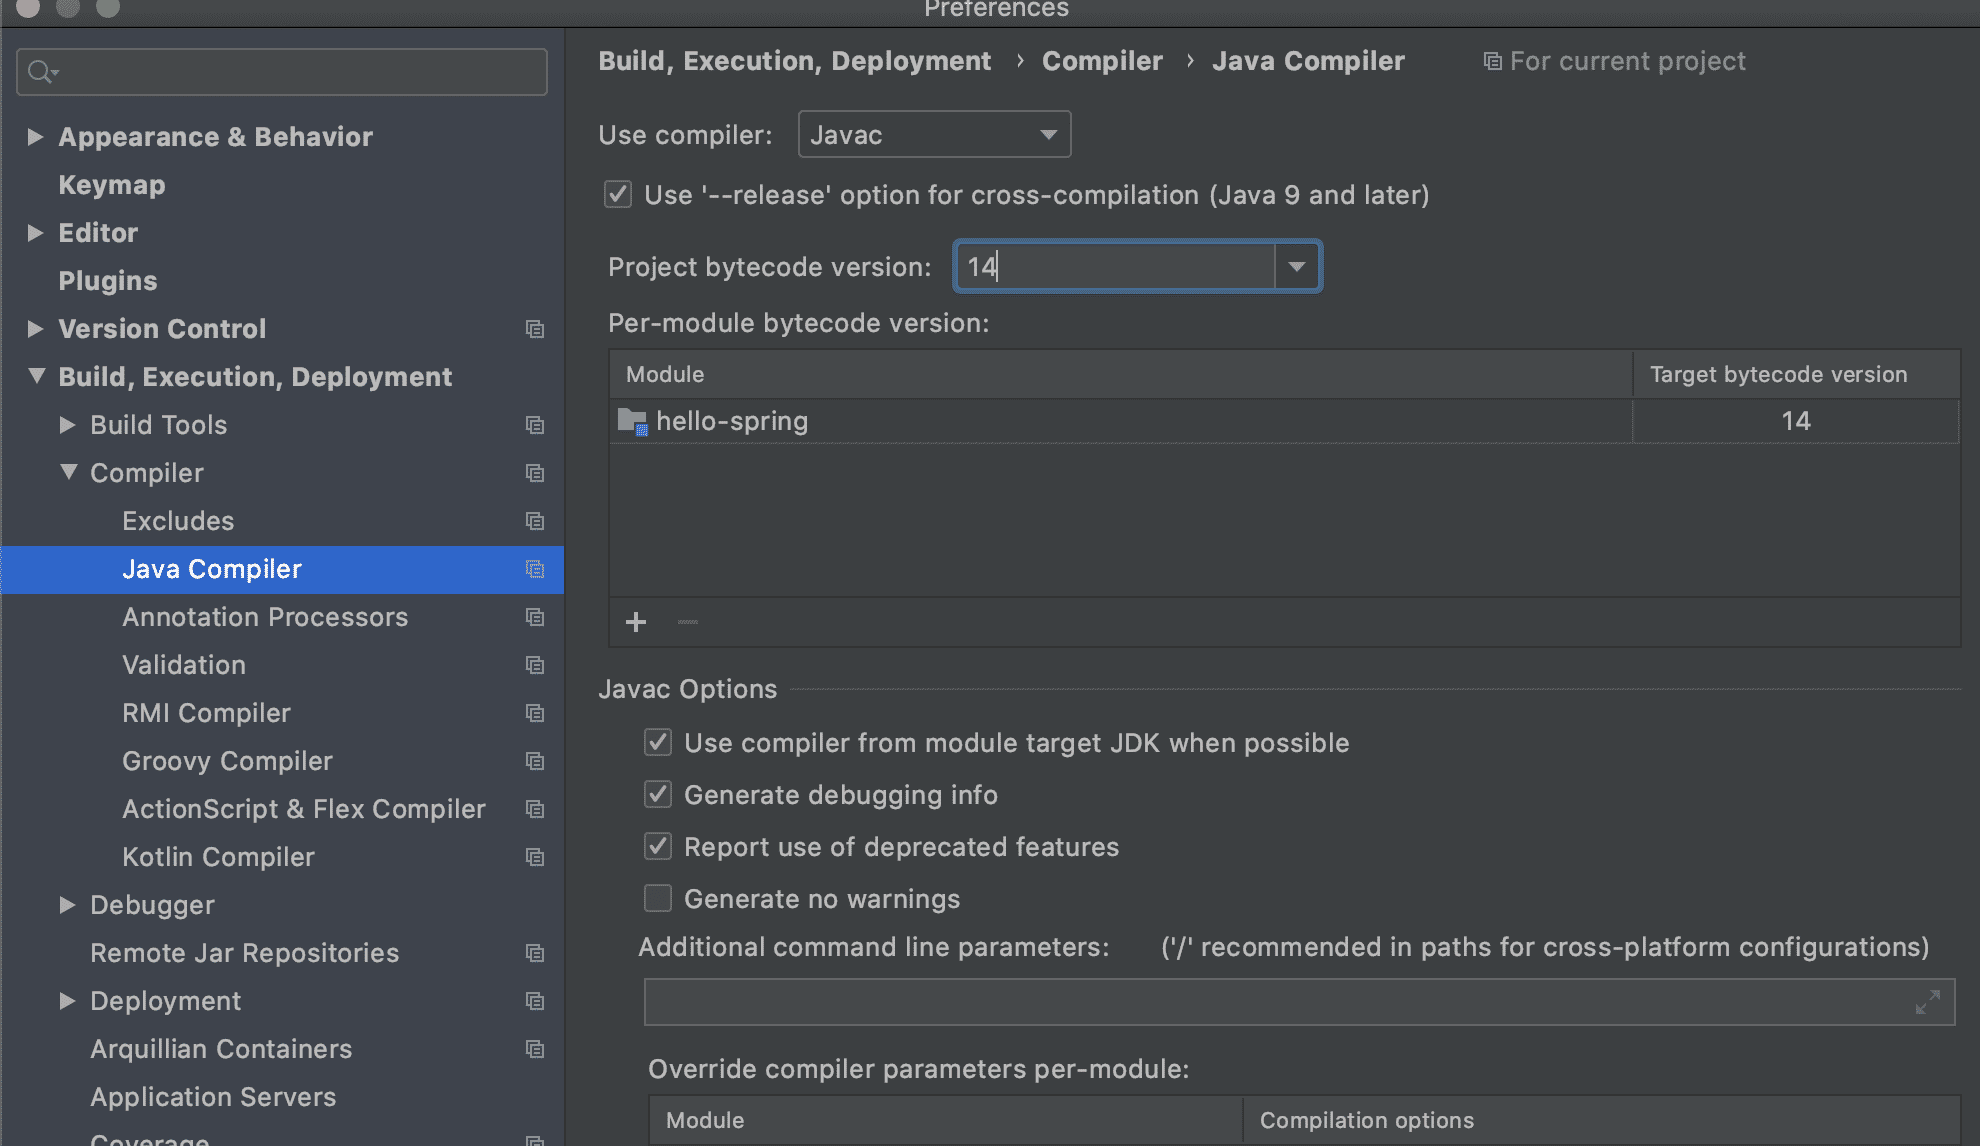
5. Error:java: 错误: 不支持发行版本 5
将file- project structure 中的jdk版本选成跟本地一直,比如我这个jdk14

将build -> java complier中的两个版本选择成跟本地一致,这里是14

这两步做好以后不会报错,maven里面不需要选择版本。
6. 如果报xml的问题
xml declaration should precede all document
那是因为xml 第一行是空格了,必须<?xml 做为第一行。
以上就是本文的全部内容,希望对大家的学习有所帮助,也希望大家多多支持好吧啦网。
相关文章:

 网公网安备
网公网安备