详解IntelliJ IDEA 自带的 HTTP Client 接口调用插件吊打 Postman
Java公众号【Java技术迷】一个在互联网领先地位,微信搜索【Java技术迷】第一时间阅读最新文章,通过下面下载链接,即可获得我精心整理的技术资料,电子书籍,一线大厂面试资料和优秀简历模板。
http://xiazai.jb51.net/202105/yuanma/javadzsh_jb51.rar
1 前言当我们在开发调试 Web 服务的时候,需要对接口进行调用测试;或者对接第三方系统时,需要调用远程第三方的接口进行联调。这时,相信大家首选的工具一般会是 Postman ,一款当今比较流行而且功能齐全的接口调用调试工具。如下所示:

不过我们一般使用 IntelliJ IDEA 代码编辑器来开发和调试 Web 服务,如果使用 Postman 工具来测试接口,不仅要在电脑上安装 Postman ,还需要在不同工具之间切换,比较麻烦。幸运地的是 IDEA 自带了一款简洁轻量级的接口调用插件,HTTP Client。

HTTP Client 是 IDEA 自带的一款简洁轻量级的接口调用插件,通过它,我们能在 IDEA 上开发,调试,测试 RESTful Web 服务。
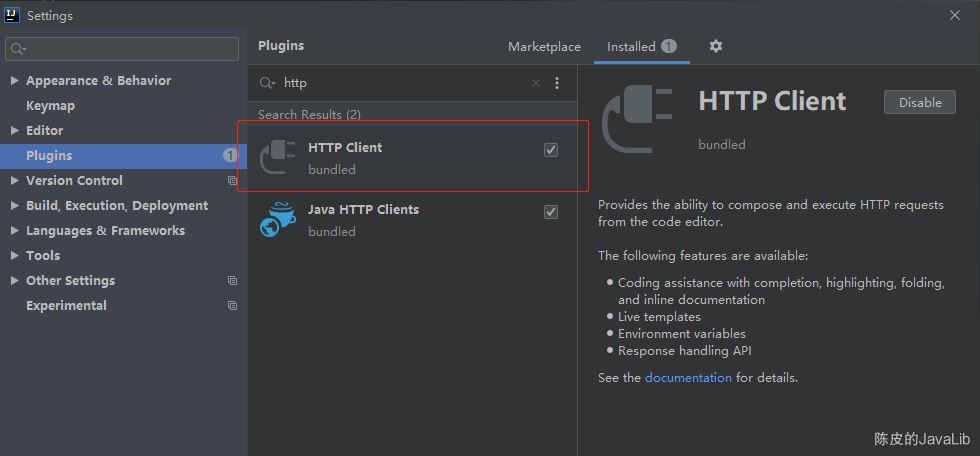
注意:确保 HTTP Client 插件是安装启动的,默认是已安装启动的。若没有安装,在 File - Settings - Plugins 路径下进行安装,如下:
可以创建2种文件类型的 HTTP Client 文件,一种是临时文件(scratch files,不跟项目工程挂钩),一种是非临时文件(physical files,跟项目工程挂钩)。
如果你想创建的 HTTP Client 文件是为了临时调用接口测试用的,不需要保留记录供以后使用,则可以使用临时文件;如果想存档记录请求参数,请求结果等,后续再继续使用,或者随项目提交到远程git仓库,则建议使用非临时文件。
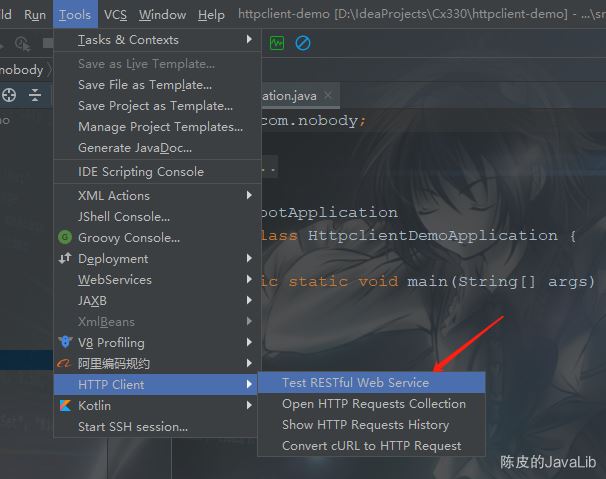
创建 HTTP Client 临时文件
打开后,显示界面和Postman差不多,不过这种风格的界面被弃用了,官方不推荐我们使用,在最新版本的 IDEA 中已经没有这个界面了。
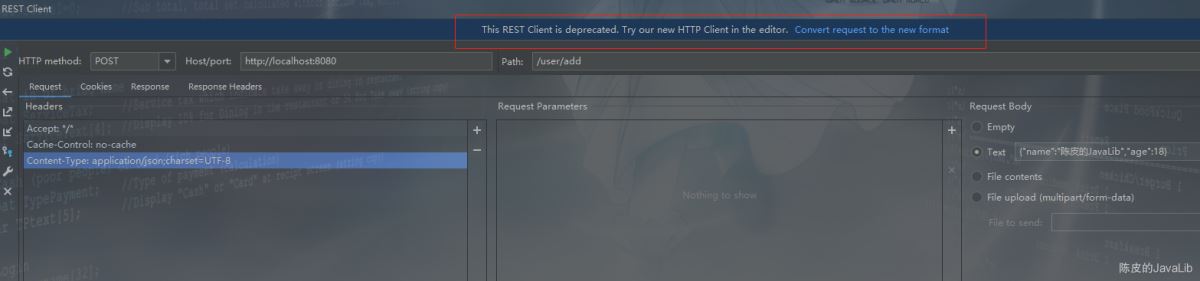
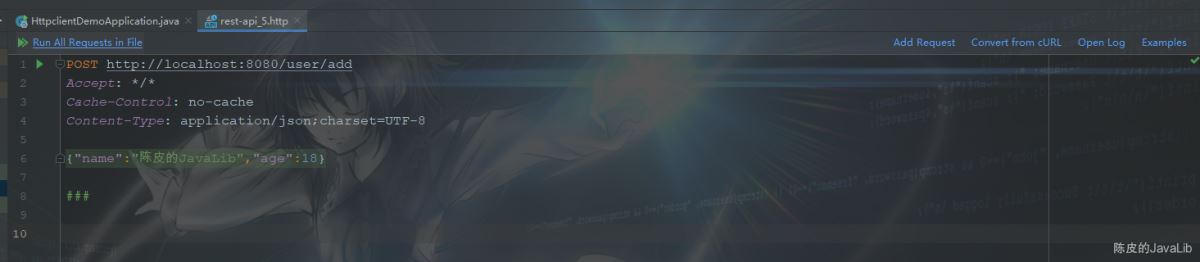
官方推荐我们使用编码式的风格界面,点击上个界面顶部的 Convert request to the new format ,即可打开新的 HTTP Client 界面。
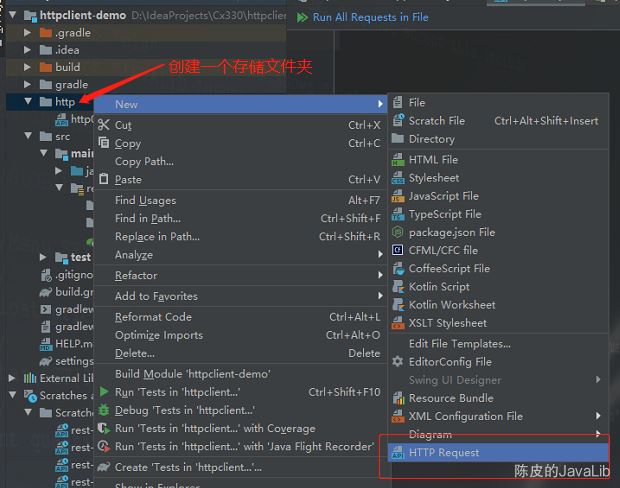
创建 HTTP Client 非临时文件
可以在项目根目录下创建一个存储请求文件的文件夹,然后在里面创建 HTTP Client 请求文件,如下:
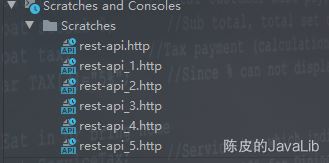
HTTP 请求存储在以.http或.rest为后缀的文件中,并且带有 API 小图标。
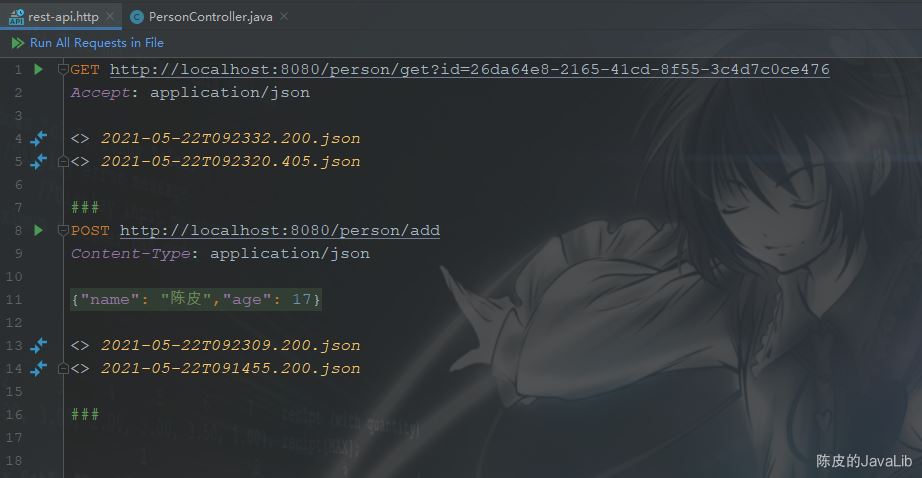
请求文件可以包含多个请求,多个请求中间用3个井号 ### 隔开;如果是临时文件,每次执行请求后,会在请求下方生成对应请求结果的文件链接,按住 Ctrl + 鼠标左键可以打开。
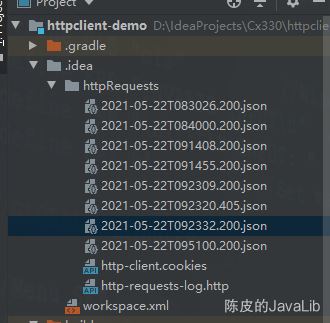
所有的请求结果,请求历史记录,cookies等信息会存放在 .idea 文件夹下,如下:
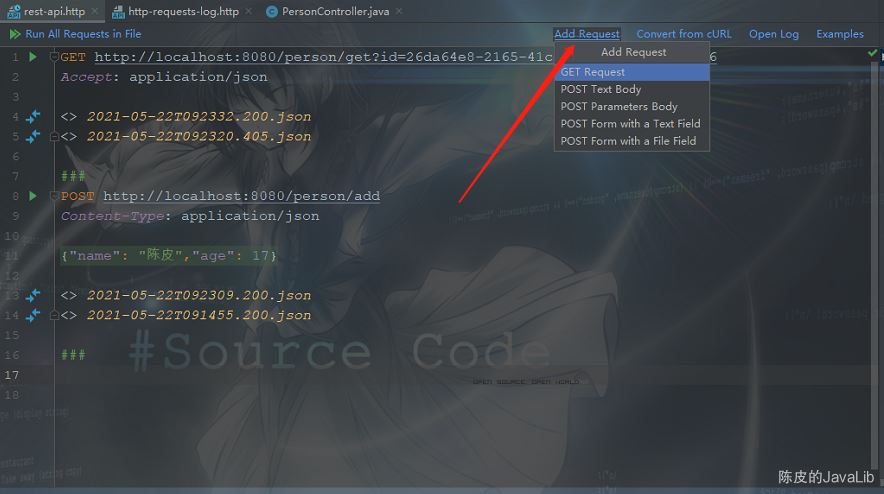
使用右上角的快捷按钮创建请求,可以选择不同方式的请求,如下:
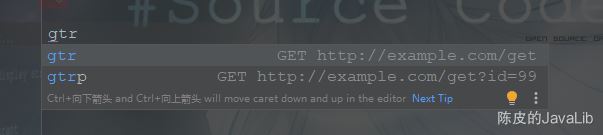
使用快捷键进行创建请求,例如输入 gtr 可以快速创建一个简单的 GET 请求,如下:
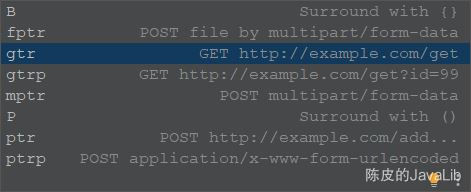
使用 Ctrl + J 快捷键可以查看创建 HTTP 请求的所有快捷键,如下:
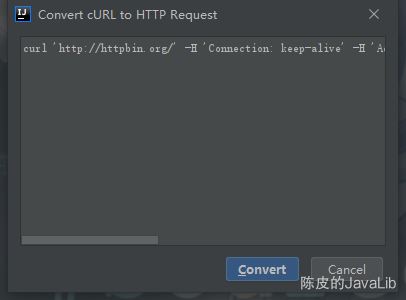
通过 cURL 创建请求,点击右上角的 Convert form cURL 按钮,然后输入 cURL 地址即可自动转换,如下:

GET
### GET request with a headerGET https://httpbin.org/ipAccept: application/json### GET request with parameterGET https://httpbin.org/get?show_env=1Accept: application/json### GET request with environment variablesGET {{host}}/get?show_env={{show_env}}Accept: application/json### GET request with disabled redirects# @no-redirectGET http://httpbin.org/status/301### GET request with dynamic variablesGET http://httpbin.org/anything?id={{$uuid}}&ts={{$timestamp}}###
POST
### Send POST request with json bodyPOST https://httpbin.org/postContent-Type: application/json{ 'id': 999, 'value': 'content'}### Send POST request with body as parametersPOST https://httpbin.org/postContent-Type: application/x-www-form-urlencodedid=999&value=content### Send a form with the text and file fieldsPOST https://httpbin.org/postContent-Type: multipart/form-data; boundary=WebAppBoundary--WebAppBoundaryContent-Disposition: form-data; name='element-name'Content-Type: text/plainName--WebAppBoundaryContent-Disposition: form-data; name='data'; filename='data.json'Content-Type: application/json< ./request-form-data.json--WebAppBoundary--### Send request with dynamic variables in request’s bodyPOST https://httpbin.org/postContent-Type: application/json{ 'id': {{$uuid}}, 'price': {{$randomInt}}, 'ts': {{$timestamp}}, 'value': 'content'}###
PUT
PUT http://localhost:8080/person/putContent-Type: application/json{'name': '陈皮','age': 17}
PATCH
###PATCH http://localhost:8080/person/putContent-Type: application/json{'name': '陈皮','age': 17}
鉴权方式
### Basic authorization.GET https://httpbin.org/basic-auth/user/passwdAuthorization: Basic user passwd### Basic authorization with variables.GET https://httpbin.org/basic-auth/user/passwdAuthorization: Basic {{username}} {{password}}### Digest authorization.GET https://httpbin.org/digest-auth/realm/user/passwdAuthorization: Digest user passwd### Digest authorization with variables.GET https://httpbin.org/digest-auth/realm/user/passwdAuthorization: Digest {{username}} {{password}}### Authorization by token, part 1. Retrieve and save token.POST https://httpbin.org/postContent-Type: application/json{ 'token': 'my-secret-token'}> {% client.global.set('auth_token', response.body.json.token); %}### Authorization by token, part 2. Use token to authorize.GET https://httpbin.org/headersAuthorization: Bearer {{auth_token}}###
断言方式
### Successful test: check response status is 200GET https://httpbin.org/status/200> {%client.test('Request executed successfully', function() { client.assert(response.status === 200, 'Response status is not 200');});%}### Failed test: check response status is 200GET https://httpbin.org/status/404> {%client.test('Request executed successfully', function() { client.assert(response.status === 200, 'Response status is not 200');});%}### Check response status and content-typeGET https://httpbin.org/get> {%client.test('Request executed successfully', function() { client.assert(response.status === 200, 'Response status is not 200');});client.test('Response content-type is json', function() { var type = response.contentType.mimeType; client.assert(type === 'application/json', 'Expected ’application/json’ but received ’' + type + '’');});%}### Check response bodyGET https://httpbin.org/get> {%client.test('Headers option exists', function() { client.assert(response.body.hasOwnProperty('headers'), 'Cannot find ’headers’ option in response');});%}###
以上就是IntelliJ IDEA 自带的 HTTP Client 接口调用插件吊打 Postman的详细内容,更多关于idea HTTP Client插件的资料请关注好吧啦网其它相关文章!
相关文章:

 网公网安备
网公网安备