使用docker制作分布式lnmp 镜像
LNMP 是代表 Linux 系统下的 Nginx、Mariadb、PHP 相结合而构建成的动态网站服务器架构。下面使用docker制作分布式lnmp 镜像。
一、docker 分布式 lnmp 镜像制作1、运行Nginx、MySQL、PHP容器#关闭防火墙及核心防护systemctl disable firewalldsystemctl stop firewalldsetenforce 0#查看3306、80及9000端口是否被占用ss -natp | grep 3306ss -natp | grep 80ss -natp | grep 9000#创建自定义网络docker network create -d bridge --subnet 172.168.184.0/24 --gateway 172.168.184.1 lnmp#运行Nginx容器docker run -itd --name nginx --network lnmp -p 80:80 --ip 172.168.184.10 nginx:1.12.0#运行MySQL容器docker run -itd --name mysql --network lnmp -p 3306:3306 --ip 172.168.184.20 -e MYSQL_ROOT_PASSWORD=010230 mysql:5.7#运行PHP容器docker run -itd --name phpfpm --network lnmp -p 9000:9000 --ip 172.168.184.30 php:7.1-fpm


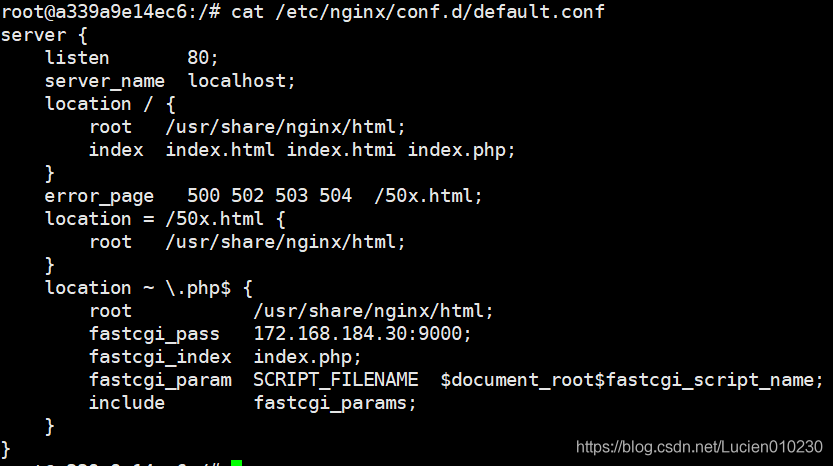
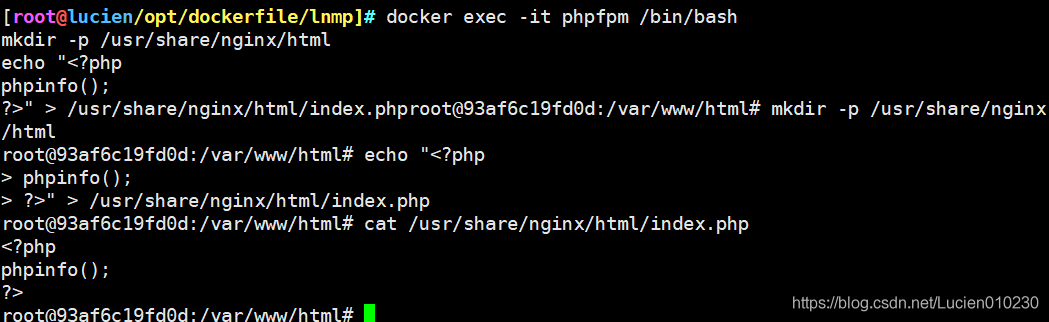
docker exec -it nginx /bin/bashecho -e 'server { listen 80; server_name localhost; location / {root /usr/share/nginx/html;index index.html index.htmi index.php; } error_page 500 502 503 504 /50x.html; location = /50x.html {root /usr/share/nginx/html; } location ~ .php$ {root /usr/share/nginx/html;fastcgi_pass 172.168.184.30:9000;fastcgi_index index.php;fastcgi_param SCRIPT_FILENAME $document_root$fastcgi_script_name;includefastcgi_params; }}' > /etc/nginx/conf.d/default.confnginx -s reloaddocker exec -it phpfpm /bin/bashmkdir -p /usr/share/nginx/htmlecho '<?phpphpinfo();?>' > /usr/share/nginx/html/index.php
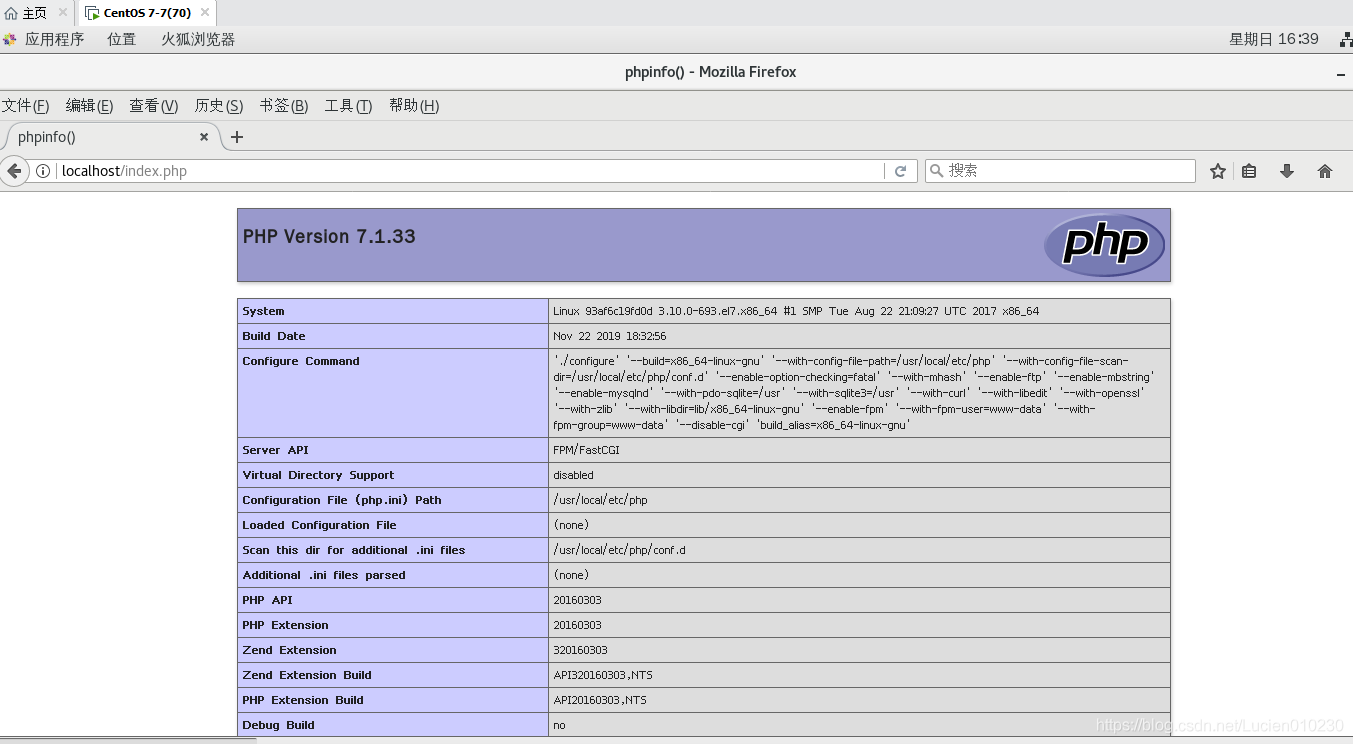
虚拟机输入localhost/index.php
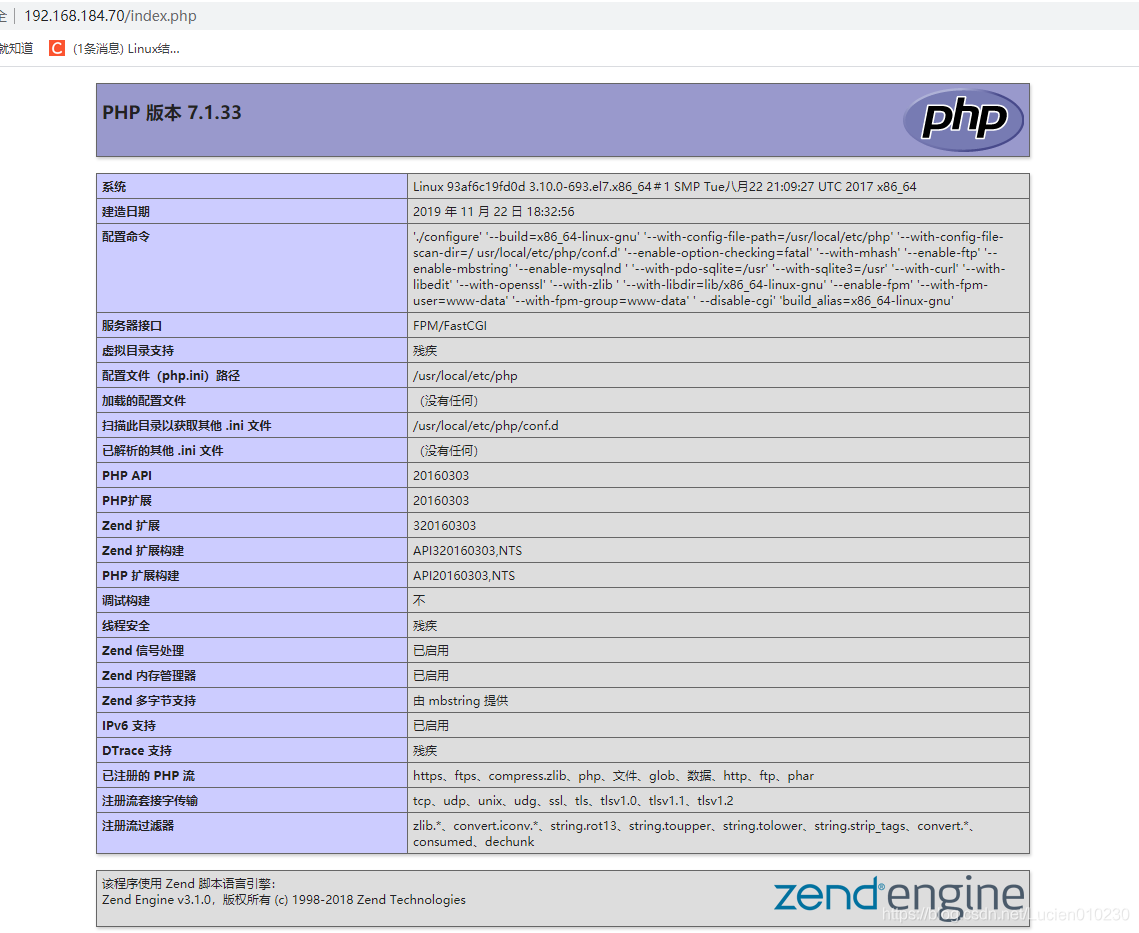
本机输入 192.168.184.70/index.php (我虚拟机地址是192.168.184.70)
以上就是使用docker制作分布式lnmp 镜像的详细内容,更多关于docker分布式lnmp 镜像的资料请关注好吧啦网其它相关文章!
相关文章:
 网公网安备
网公网安备