Win11怎么获取Trustedinstaller权限?Win11需要来自Trustedinstaller的权限怎么办?
微软为了提高系统的安全性,对系统的权限把握的很严格,为了避免恶意软件影响到系统的安全,微软不允许软件随意修改系统文件。TrustedInstaller是Windows的一个安全主体,拥有修改系统文件的权限,拥有一个用户组。
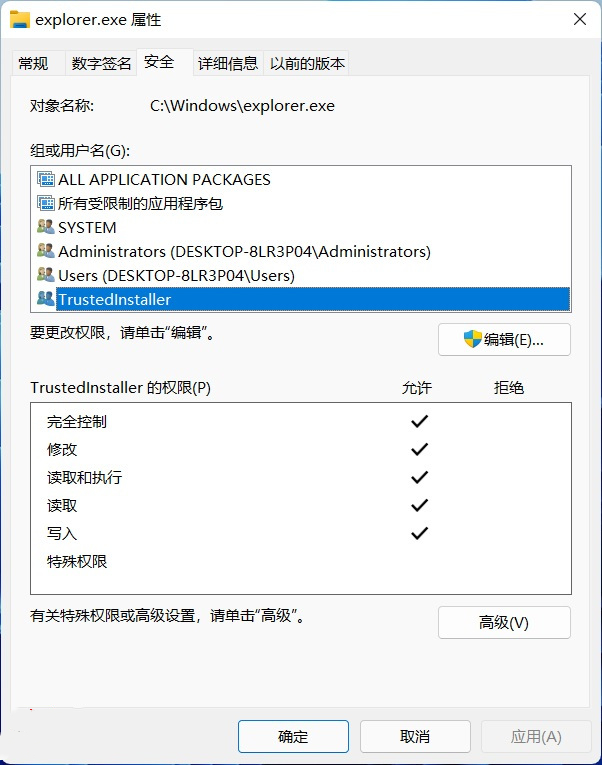
拥有完全控制权限的 Trustedinstaller 用户组
它的全名是:NT SERVICETrustedInstaller。从名字中我们不难发现,这其实是 NT 服务,并非一个实际存在的用户组。
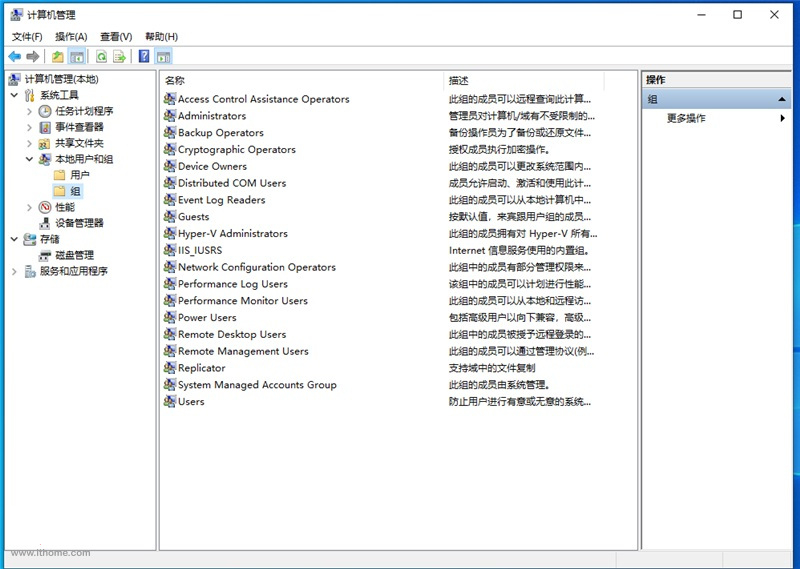
在本地用户和组内无法找到 Trustedinstaller
那如果我是 DIY 玩家,又或者因为一些原因,想要修改某些系统功能,该如何操作呢?如今,网络上提供的方法,大部分都是修改文件的所有者为系统管理员用户,然后再对管理员用户添加完全控制权限。
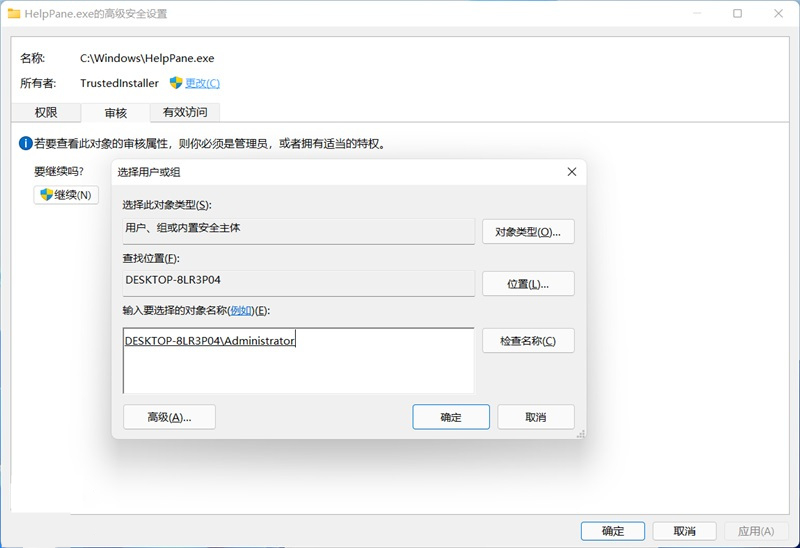
修改系统文件所有者
这个方法虽然可以实现修改系统文件,但是每次修改完成后,很多人都会忘记把权限和所有权修改回来,留下安全隐患。而且如果需要修改某文件夹内的多个文件时,除非将整个文件夹内的所有文件一起修改,不然会很繁琐。
还有一种获得 Trustedinstaller 的方式是,通过交互式服务检测,但是在最新的 Windows 11(Windows 10)中,这种方法已经失效了。

那在新的系统中又该如何获得 Trustedinstaller 权限呢?
其实我们还可以通过 Set-NtTokenPrivilege 窃取 Trustedinstaller 的本体 Trustedinstaller.exe 的 Token,来创建其子进程。在开始之前我们需要保证你的 Powershell 版本为 5.0 以上(Windows 10 以上版本已经自带 Powershell 5.0 了,其他版本 Windows 需要进行更新)。
准备工作
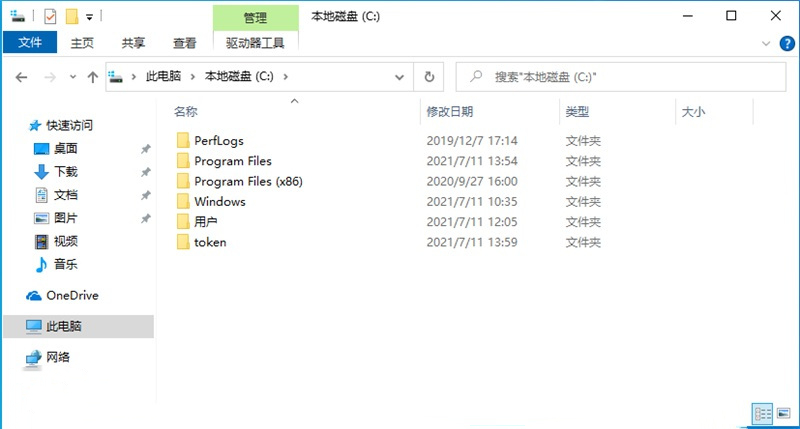
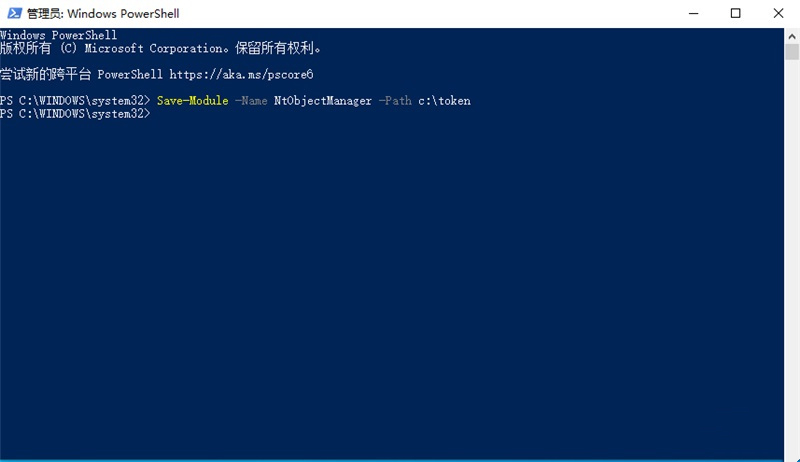
首先,我们需要下载并安装 Set-NtTokenPrivilege 命令所需模块,我们先在系统 C 盘根目录新建名为“token”的文件夹。
接着,我们以管理员身份运行 Powershell,然后输入(其中 C:token,为我们刚刚新建文件夹的路径):
Save-Module -Name NtObjectManager -Path c:token
并回车(第一次安装会出现询问,输入“Y”并回车):
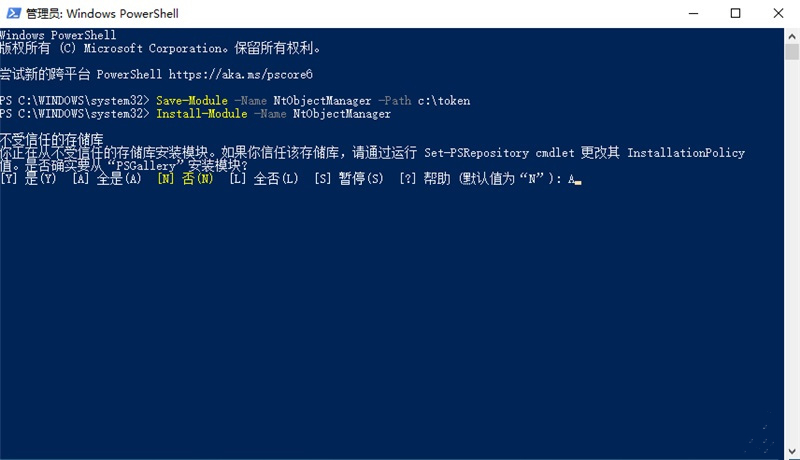
稍等片刻下载完成后,我们输入:
Install-Module -Name NtObjectManager
并回车,正式安装。若出现不受信任的存储库,输入“A”并回车:
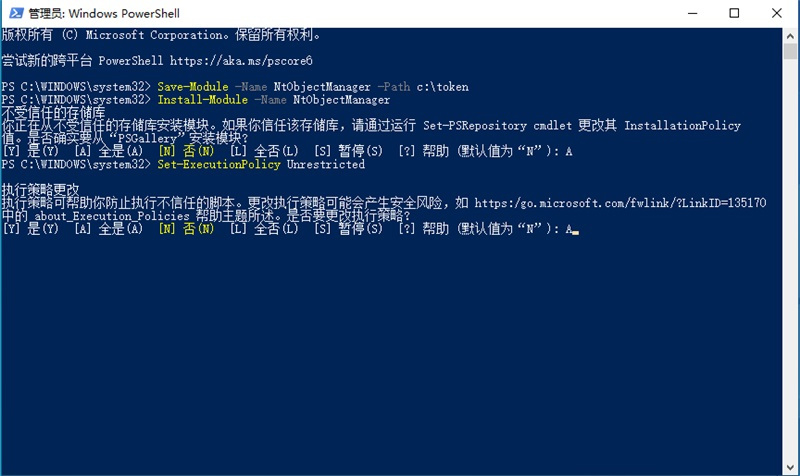
稍等片刻,等待安装结束。结束后,我们需要让系统允许使用 Powershell 脚本,我们输入:
Set-ExecutionPolicy Unrestricted
并回车。接着系统会显示执行策略更改,我们输入”A“并回车确认:
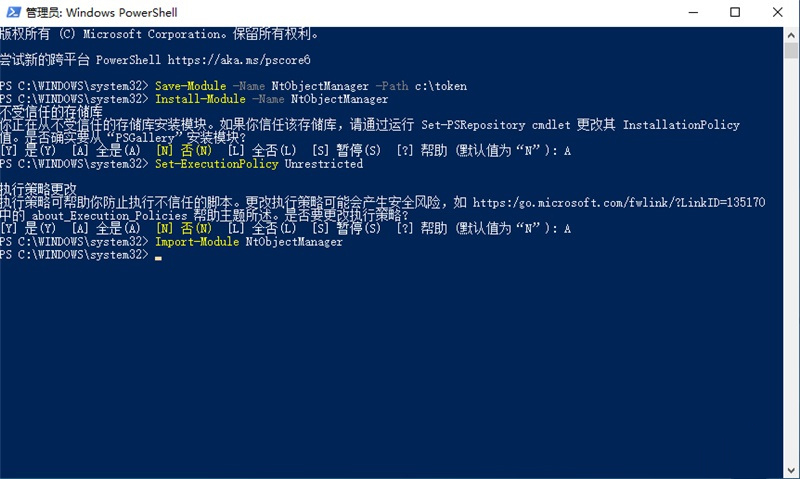
接着,我们导入 NtObjectManager 模块,我们输入:
Import-Module NtObjectManager
并回车。至此,我们前期准备工作结束:
正式开始
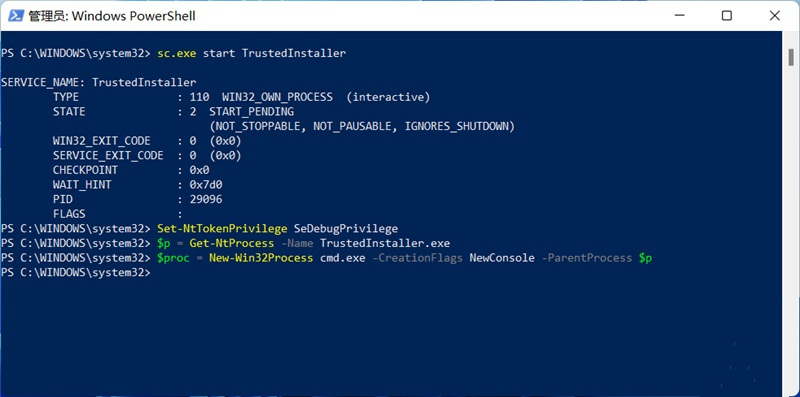
现在,我们开始正式获得 Trustedinstaller 权限。在 Powershell 中依次输入:
sc.exe start TrustedInstallerSet-NtTokenPrivilege SeDebugPrivilege$p = Get-NtProcess -Name TrustedInstaller.exe$proc = New-Win32Process cmd.exe -CreationFlags NewConsole -ParentProcess $p
并回车。
接下来系统会打开一个命令提示符,该命令提示符就具有 Trustedinstaller 权限,可以直接修改系统文件。我们可以通过:
whoami /groups /fo list
进行测试:
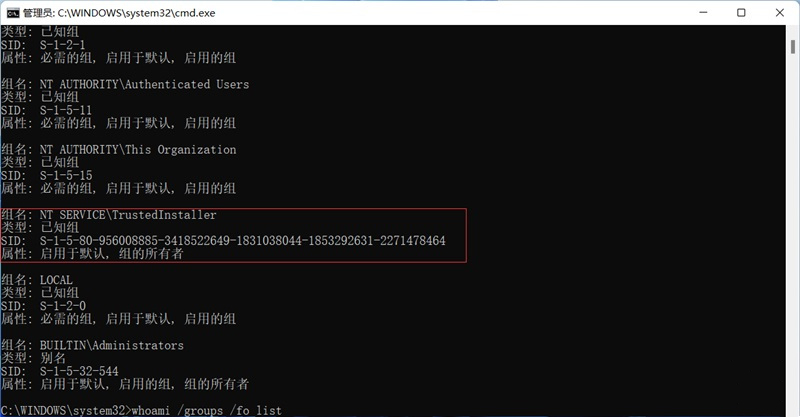
可以看到我们已经获得 Trustedinstaller 权限了,现在就可以通过一些命令修改系统文件了。如果想要更加方便操作,可以通过此 CMD 运行 taskmgr、notepad 等应用,在运行新任务、打开文件的浏览窗口下,进行文件编辑。编辑结束后直接关闭即可。
注意!不要使用 CMD 运行 explorer,因为 explorer 无法在当前用户下正常使用。在这之后如果,想要重新获得 Trustedinstaller 权限重新执行以下命令即可:
sc.exe start TrustedInstallerSet-NtTokenPrivilege SeDebugPrivilege$p = Get-NtProcess -Name TrustedInstaller.exe$proc = New-Win32Process cmd.exe -CreationFlags NewConsole -ParentProcess $p相关推荐:Win系统中文版下载|Win11系统安装步骤
相关文章:
 网公网安备
网公网安备