文章详情页
PPT制作小球单摆运动动画图文步骤
浏览:63日期:2022-11-27 17:14:33
有许多小伙伴还不会借助PPT制作小球单摆运动动画,使用下面就分享了PPT制作小球单摆运动动画的图文操作方法,希望感兴趣的朋友都来共同学习哦。
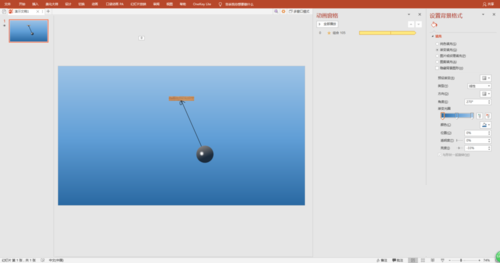
我们需要打开PPT,新建文件,删除幻灯片中的文本框,设置蓝色渐变背景。
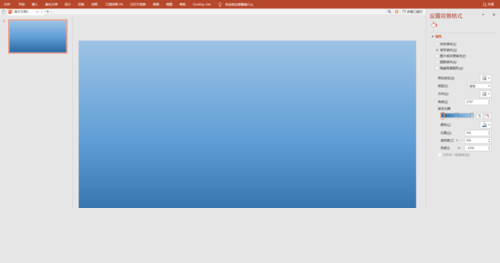
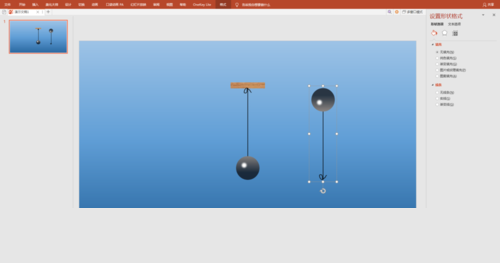
然后我们插入矩形、圆形、直线、任意曲线等形状。
再将形状拼接在一起,组成单摆样子。
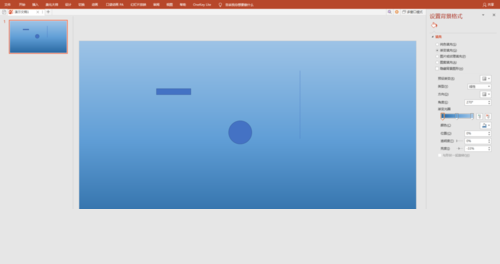
接着为各部分设置不同的填充颜色或纹理,其中小球再添加上高光效果。

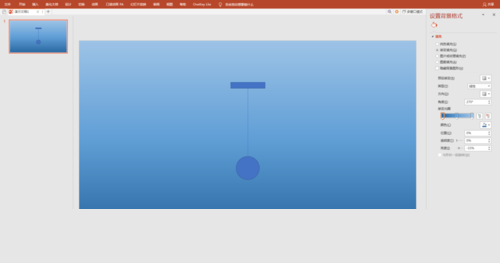
再将”木块“除外的形状”组合“后,进行复制。复制的形状进行垂直旋转。
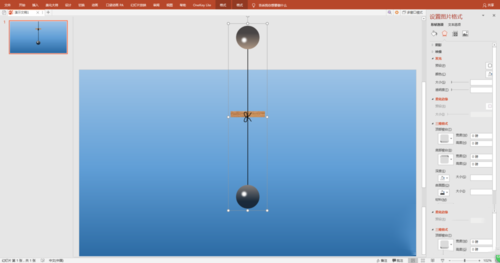
这时候将”线“”球“部分与复制的部分”垂直“对接后组合在一起。为整个组合体添加”陀螺旋“动画。
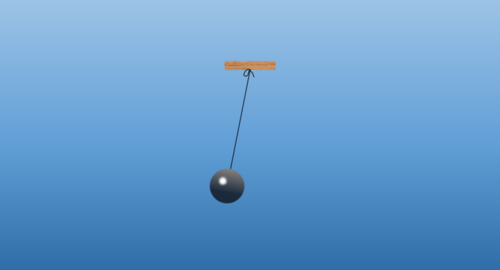
然后设置效果选项,角度、时间、自动翻转等。
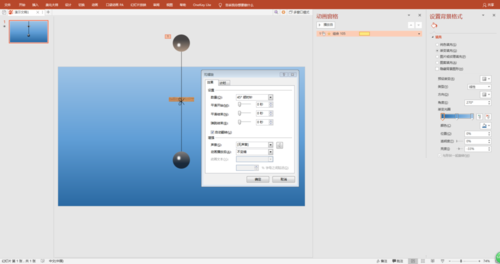
整体调整一下角度。注意旋转中心即”绳结“位置不要动。
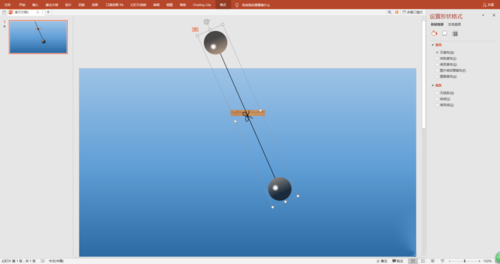
接着选择组合体中的”复制“部分,设置为无填充颜色或100%透明度,使其隐身化。
最后就是放映幻灯片,欣赏小球摆来摆云的动画效果。
上文就讲解了PPT制作小球单摆运动动画的图文步骤,希望有需要的朋友都来学习哦。
标签:
ppt
上一条:PPT制作弹珠效果操作流程下一条:ppt设置双面打印的操作流程
相关文章:
排行榜

 网公网安备
网公网安备